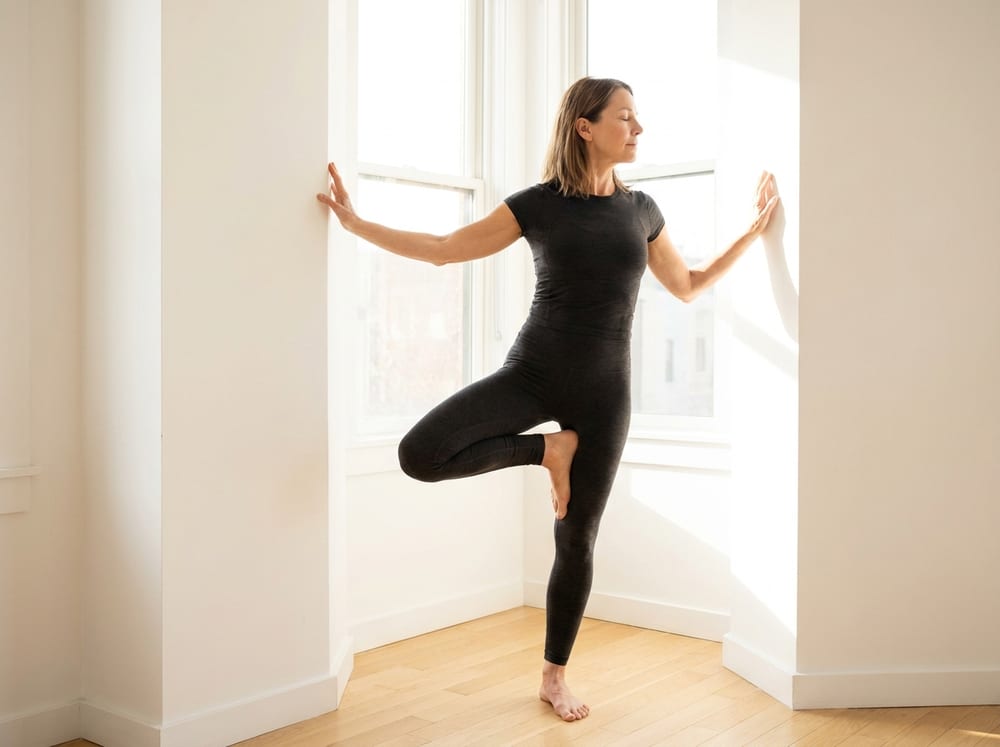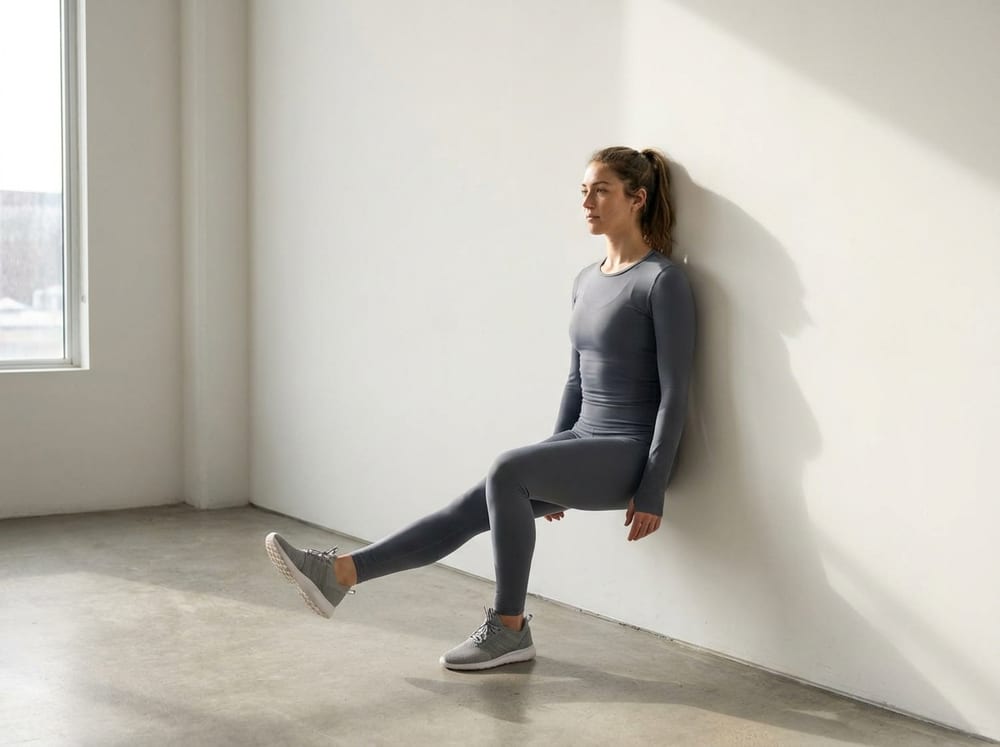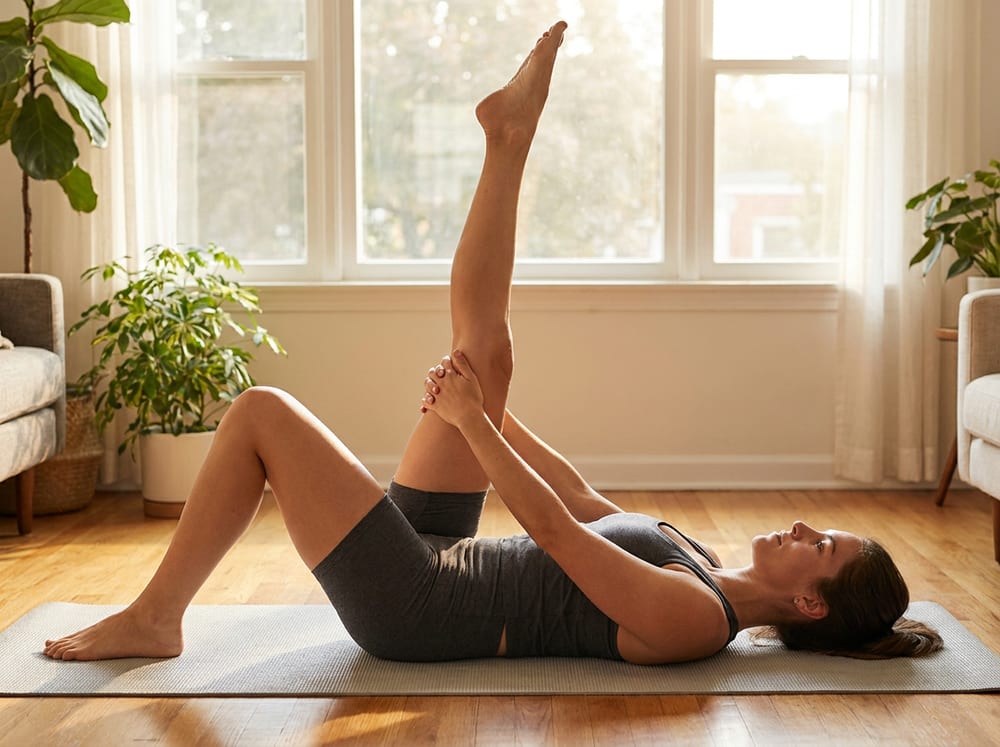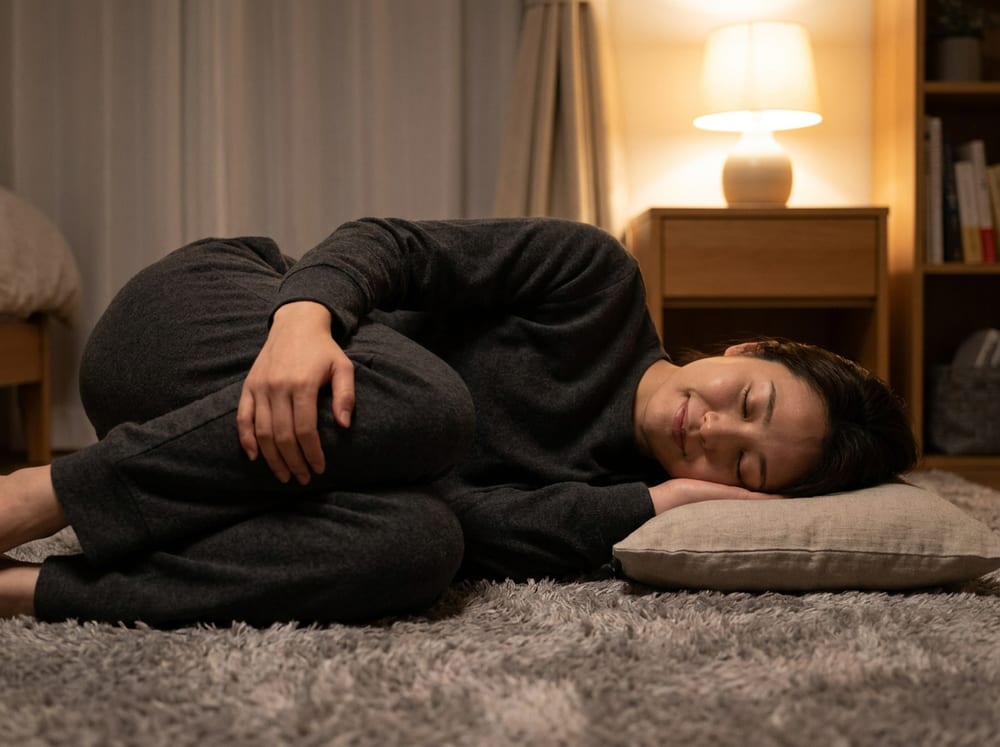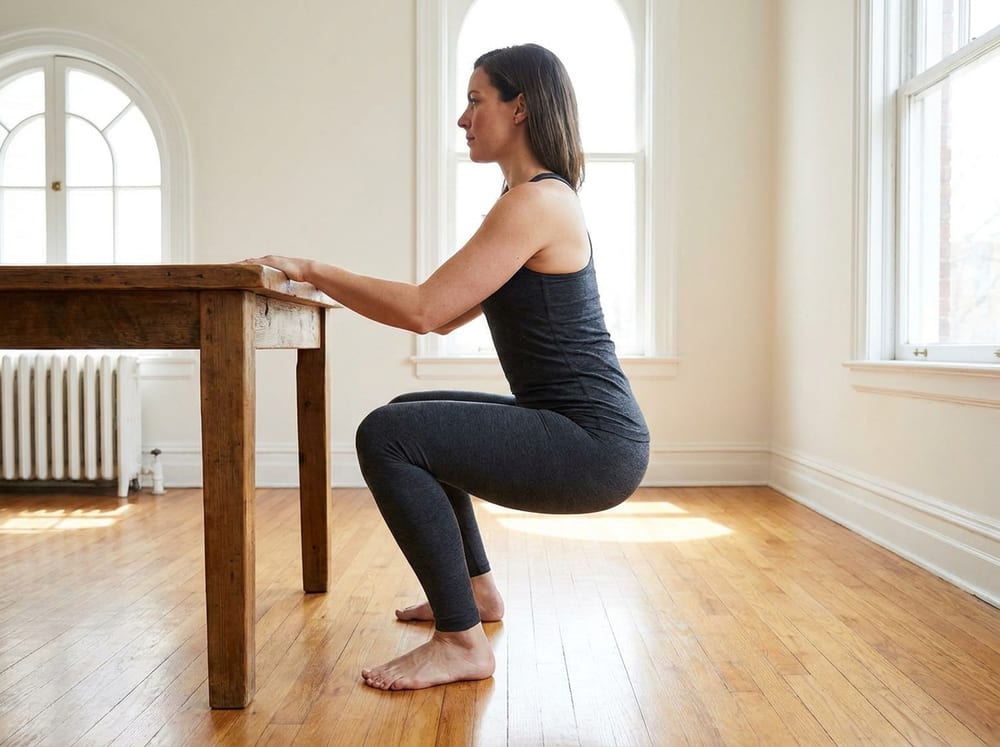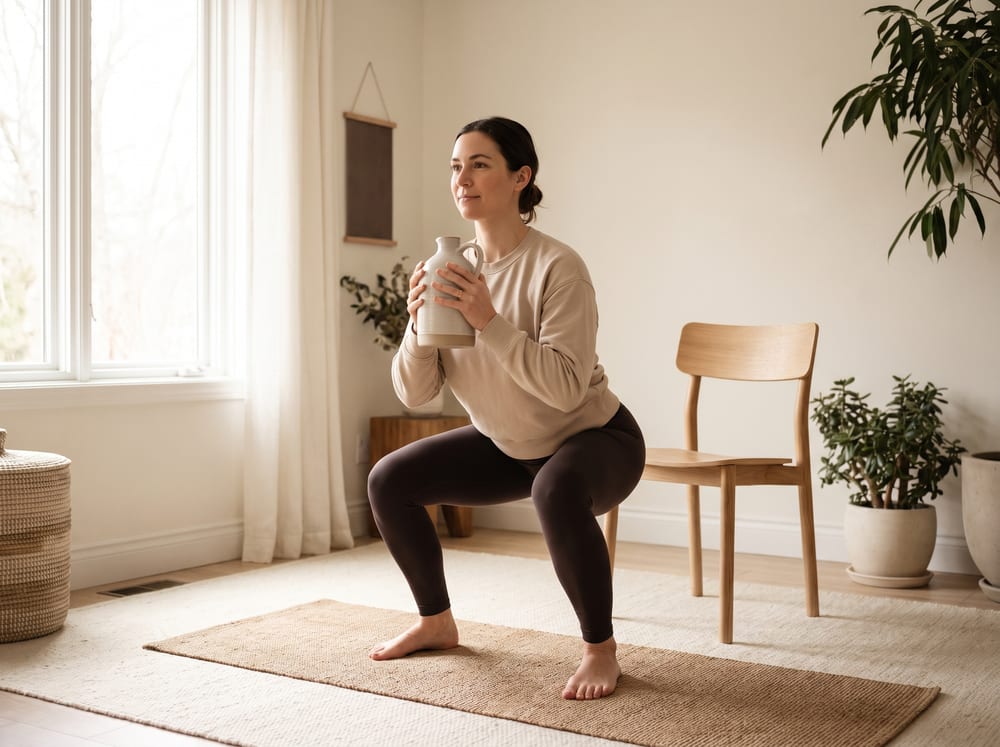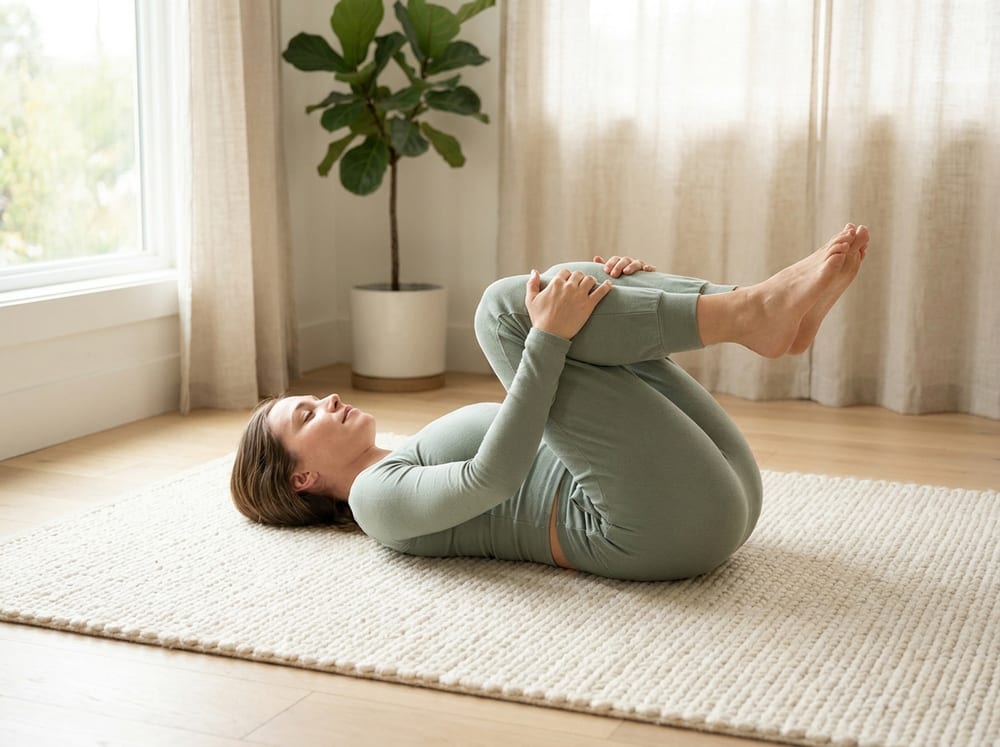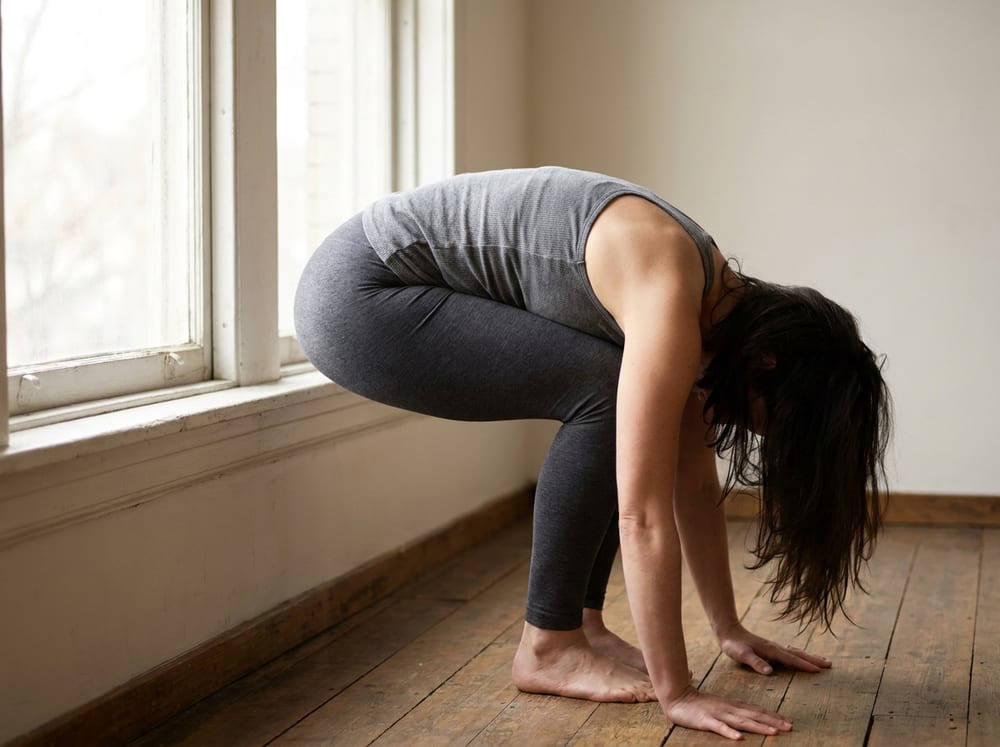
Person performing a controlled bodyweight movement on a mat in a bright home space
No gym required

Move Well, Anywhere

Bodyweight work you can do at home, tuned for how you want to feel: mobility, balance, strength, and flexibility, now also for sexual health, stress, and sleep. Filter by movement type or by goal.

Tap a movement type to see what it trains — filter by type or goal.

Type
Goal

49 exercises

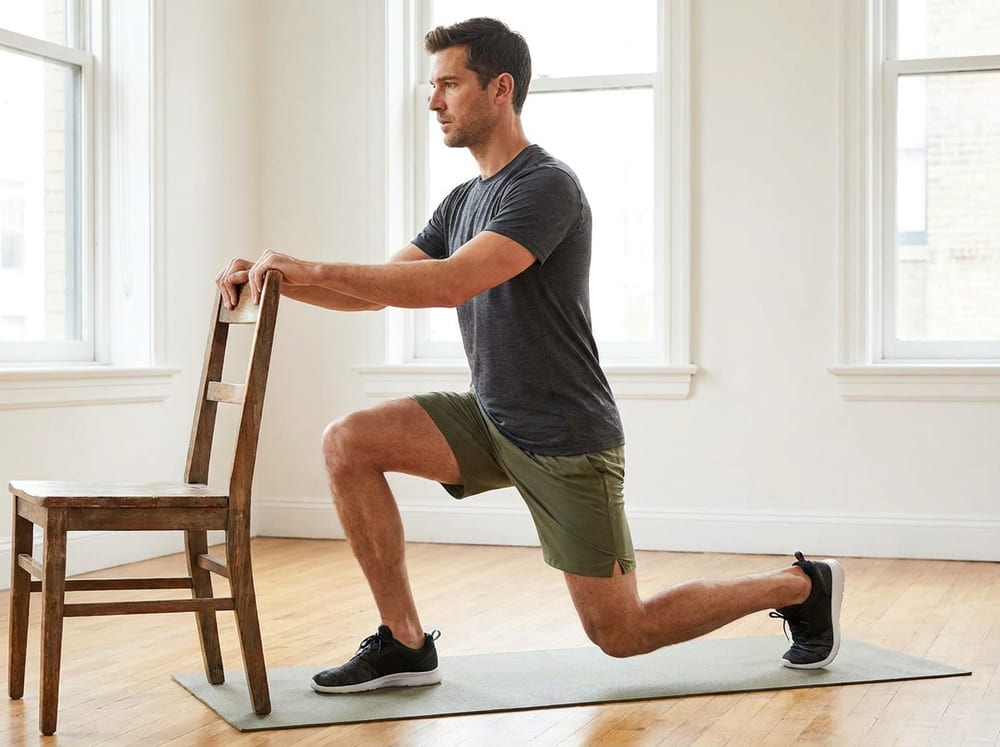
A man in neutral olive athletic shorts and a plain t-shirt performing a split squat beside a wooden chair in a bright, airy room, fingertips resting lightly on the chair, torso tall, front thigh near parallel and back knee lowered toward the floor in controlled form. Strength

Bodyweight Split Squat

intermediate
StrengthLongevity

A single-leg-emphasis strength exercise that builds unilateral leg strength and hip stability, using a chair or wall for light balance support while the working leg does the real work.

WhyLife happens on one leg at a time: every step you take is a single-leg loading event. The split squat trains each leg independently, which exposes and corrects the left-right strength asymmetries that a two-legged squat lets you hide, and those asymmetries are a documented predictor of falls in older adults. It heavily loads the quadriceps and glutes of the front leg while stretching and strengthening the hip flexors of the rear leg, countering the shortened hip flexors that come from sitting. The added demand on the ankle, knee, and hip stabilizers builds the joint proprioception and control that keep you upright when the ground is uneven.

How to do it
  1. Stand in a split stance, one foot forward and one back about two feet apart, resting fingertips on a chair or wall for balance only.
  2. Keep your torso tall and lower straight down by bending both knees, letting the back knee travel toward the floor.
  3. Descend until your front thigh is near parallel and your back knee hovers just above the ground.
  4. Drive through the front heel to stand back up, keeping the front knee tracking over your second toe.
  5. Complete all reps on one side, then switch legs; use the support as little as you safely can.

Dose: 3 sets of 8 reps per leg, 2-3x/week; reduce hand support and add a slow 3-second descent to progress

⚠ Use the chair or wall for balance, not to hoist yourself up. Keep the front knee from caving inward. If the rear knee is sensitive, place a cushion under it or reduce depth.
quadricepsgluteus maximuship flexorsankle and knee stabilizers
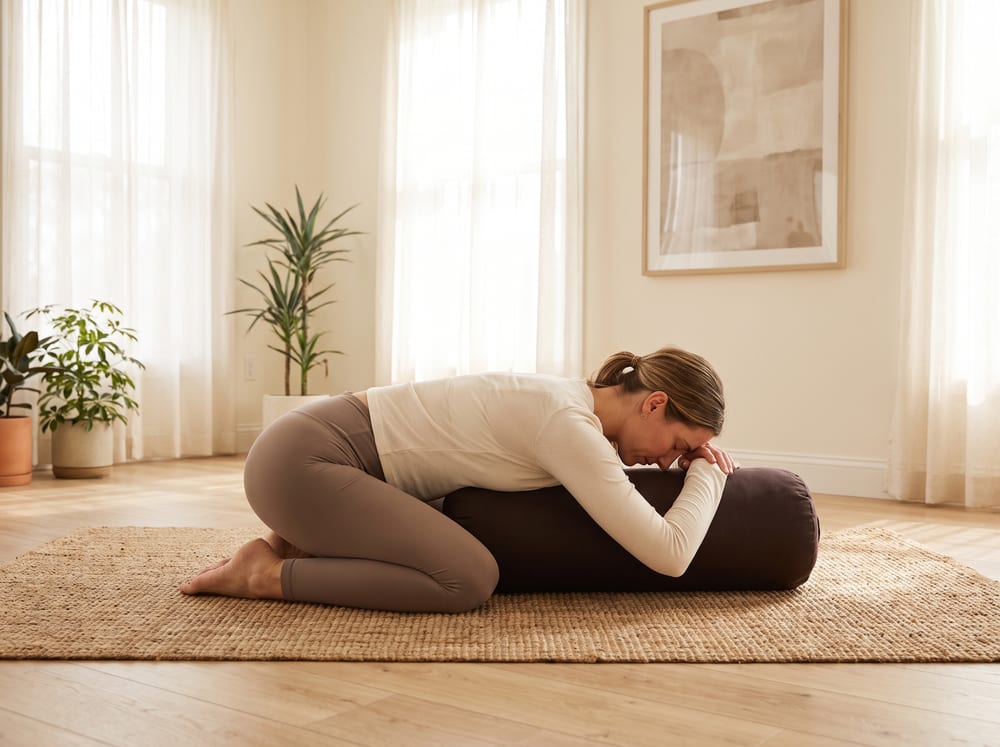
A warm, photorealistic editorial photograph in soft natural light with a warm ivory and espresso palette, 4:3 framing, no text or words anywhere: a woman in her early thirties in modest neutral taupe leggings and a fitted cream top kneeling on a mat in a bright calm room, folded forward over a firm bolster with her torso fully supported and her forehead resting to one side; her spine is long and level and her body is upright and vertical relative to the mat, squarely framed and not tilted or rotated, hips settled back and shoulders relaxed. Flexibility

Bolster-Supported Child's Pose for Cramp Relief

beginner
MenstrualStress

A wide-kneed restorative fold performed over a bolster or stacked cushions, so the belly and chest rest fully supported while the hips settle back and the low back lengthens, letting the whole posture be held passively for several minutes during a cramping period.

WhyMenstrual cramps come largely from the uterus contracting under prostaglandin signaling, and that visceral discomfort is amplified by reflexive guarding in the low back and abdominal wall. Folding forward over a bolster gently lengthens the lumbar paraspinals and thoracolumbar fascia and lets the abdominal wall go slack rather than bracing, which can reduce the muscular guarding layered on top of the cramp. Because the torso is fully propped, the pose demands no effort and can be held long enough for the stretch reflex to quiet, and the enclosed, face-supported shape tends to lower sympathetic arousal and encourage slower diaphragmatic breathing, which shifts autonomic balance toward the parasympathetic side. Evidence here is modest: small randomized trials and reviews suggest gentle yoga and stretching can reduce period pain intensity, but studies are small and quality is mixed, so this is best understood as a low-risk comfort measure rather than a proven treatment. It does not address the underlying cause of pain.

How to do it
  1. Kneel on a mat and place a bolster or stack of cushions lengthwise on the floor in front of you.
  2. Widen your knees to about mat width, bring your big toes toward each other, and settle your hips back toward your heels so there is room for the belly between the thighs.
  3. Exhale and fold forward, laying your chest and belly along the bolster so it fully supports your torso rather than hanging in space.
  4. Turn your head to one side or rest your forehead on the bolster or a folded towel, and let your arms drape softly alongside or forward.
  5. Let the belly rest heavy and breathe slowly and low into the abdomen and back ribs, softening the low back a little more with each exhale.
  6. Hold, then turn your head to the other side partway through so the neck is not held in one rotation the whole time.

Dose: 1 to 3 supported holds of 3 to 5 minutes, used as needed during a painful period

⚠ This is educational content for discussion with a clinician, not medical advice or a prescription. Place cushions under the hips or between the calves and thighs if the knees or ankles feel strained, and a rolled towel behind the knees if they do not fully bend. Ease off with acute knee injury or if the deep knee bend hurts. Seek medical care for period pain that is severe, worsening, new, or accompanied by fever, heavy bleeding, faintness, or pain outside your normal pattern, since these can signal conditions that need evaluation.

lumbar spineerector spinaethoracolumbar fasciahipsabdominal wall
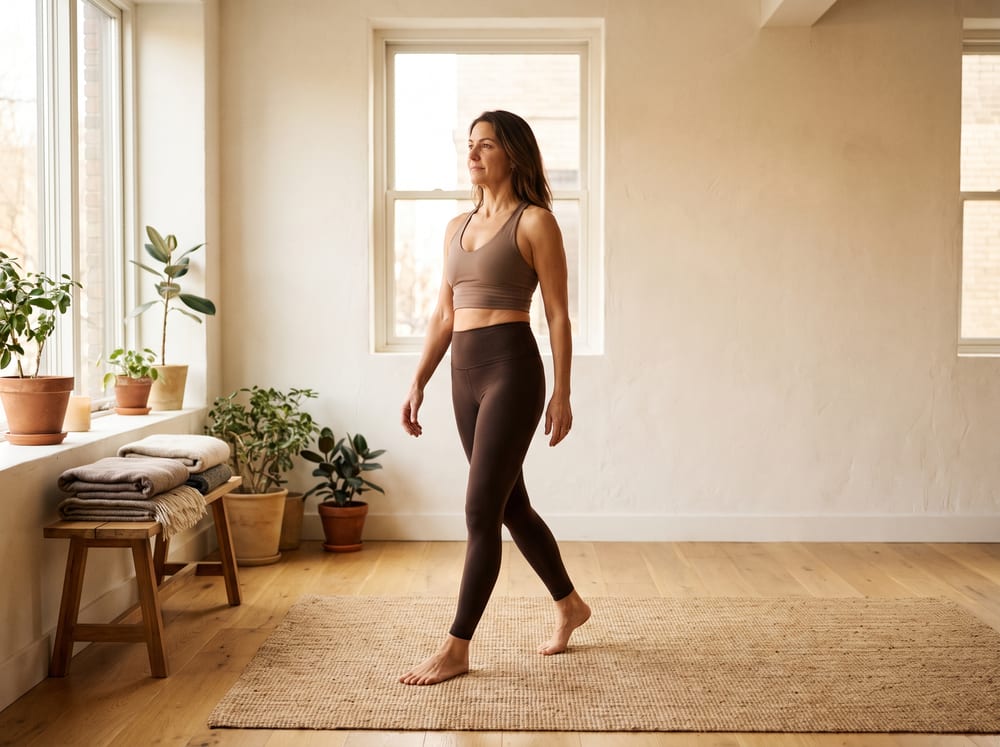
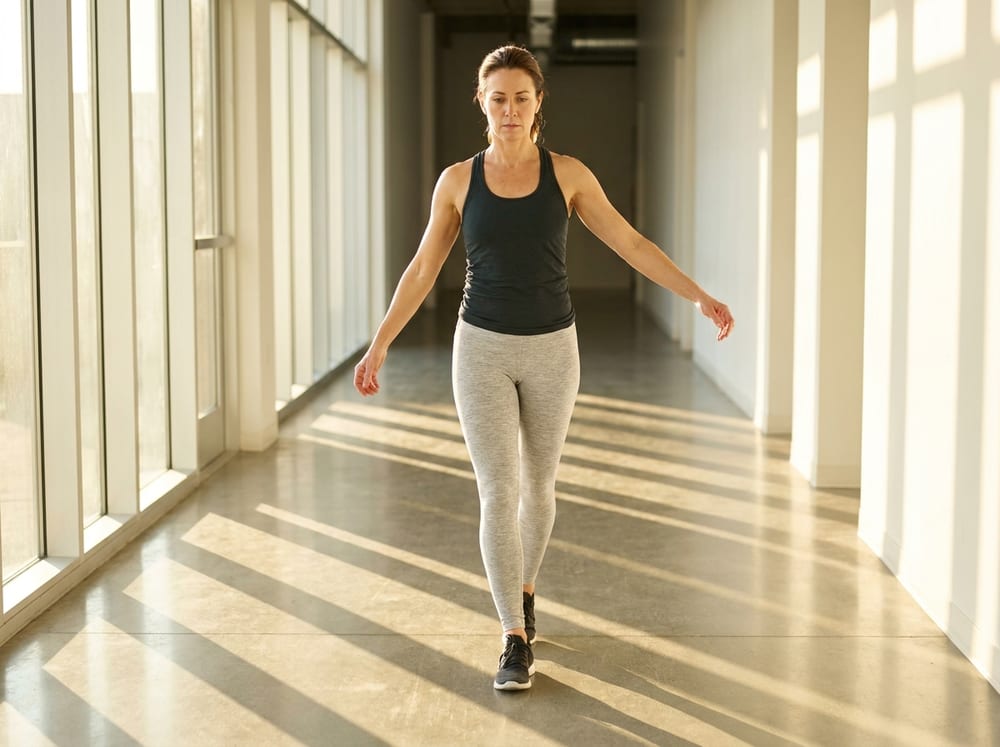
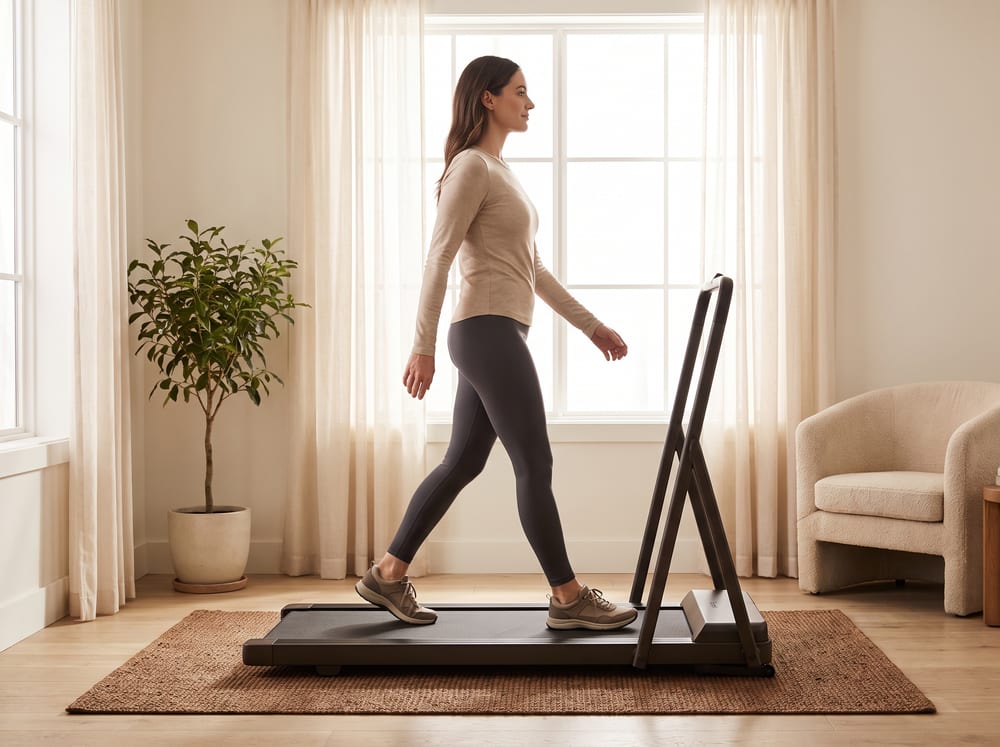
A warm, photorealistic editorial photograph in a bright calm room with a soft ivory and espresso palette, soft natural window light, 4:3 framing, no text or words anywhere. A woman in her early thirties in modest neutral athletic wear and supportive walking shoes strides on a plain treadmill placed on an exercise mat, her torso upright and vertical and squarely facing forward rather than rotated, mid-stride with a relaxed natural arm swing and a calm, easy expression. Balance

Brisk Walking Interval Protocol

beginner
FertilityCardioLongevity

A structured indoor-treadmill or outdoor walk that alternates an easy conversational pace with short brisk intervals, building whole-body circulation, steady-state fitness, and healthy body composition at an intensity deliberately kept moderate to avoid overtraining.

WhyRegular moderate walking is among the best-supported and lowest-risk forms of activity for the metabolic factors tied to fertility. It improves insulin sensitivity, supports a healthy body composition, and boosts systemic and pelvic blood flow, all plausible contributors to more regular ovulation in women and to better sperm parameters in men, where the same brisk gentle intervals also improve circulation and body composition. Observational evidence links moderate physical activity with better fertility outcomes, while very high-volume, high-intensity exercise has in some studies been associated with reduced fertility, especially in already-lean, heavily training women. That contrast is the core prescription: the light brisk intervals here add a modest cardiovascular stimulus and step count without pushing toward the exhaustive volumes that can suppress the reproductive axis. The evidence for walking's general metabolic and cardiovascular benefits is strong; the specific fertility link is moderate and largely observational, so treat this as supportive foundation rather than a guaranteed intervention. It is filed as a balance and gait drill because upright locomotion also trains single-leg stance and steadiness with every step.

How to do it
  1. Stand tall and begin walking at an easy, conversational pace for 5 minutes to warm up.
  2. Pick up to a brisk pace, where breathing deepens but you can still speak in short sentences, for 1-2 minutes.
  3. Ease back to the comfortable conversational pace for 2-3 minutes to recover.
  4. Alternate the brisk and easy segments for a total of about 20-40 minutes, staying at a moderate effort you could sustain and never sprinting to breathlessness.
  5. Keep your posture upright and vertical with relaxed shoulders and a natural arm swing, letting each stride roll smoothly heel to toe.
  6. Finish with 5 minutes at an easy pace to cool down.

Dose: One 20-40 minute session, aiming for most days of the week and roughly 150 minutes of moderate walking total, keeping intensity moderate rather than exhausting

⚠ This is educational information for discussion with your clinician, not medical or fertility advice. Keep intervals moderate: very high-volume or high-intensity training can work against fertility, so this is not the place to push hard. If you are pregnant or trying to conceive, clear your activity level with your care team, walk on even surfaces, stay hydrated, and stop for chest pain, dizziness, unusual shortness of breath, or pelvic pain. Build duration gradually if you are new to regular walking.

cardiovascular systemlegsglutealsgait and balancewhole-body circulation
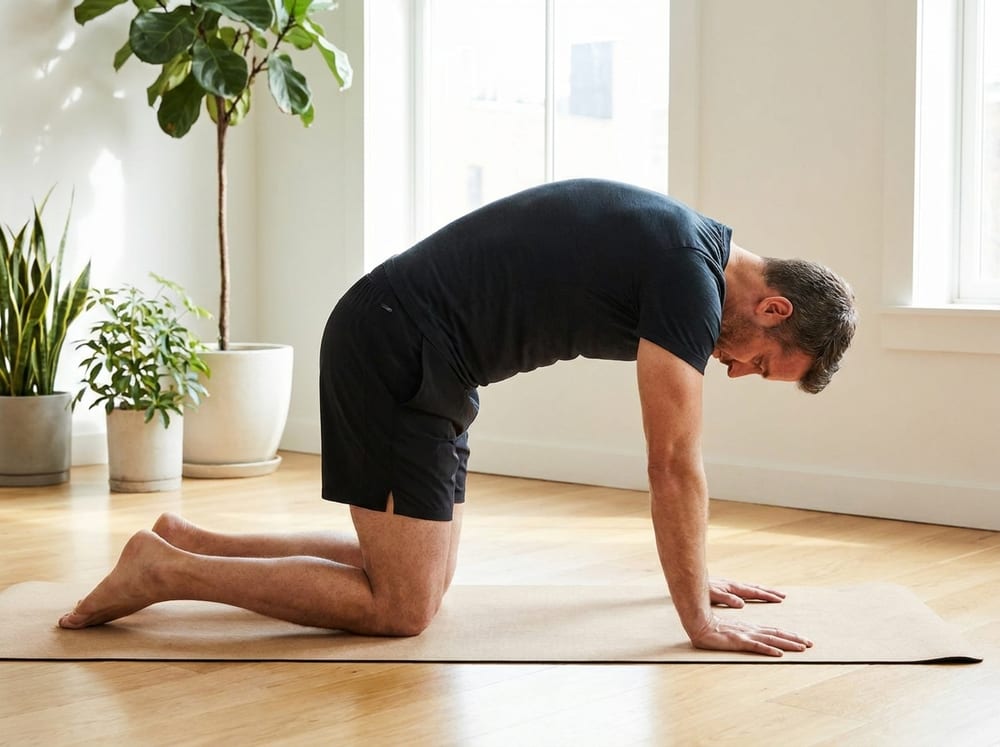
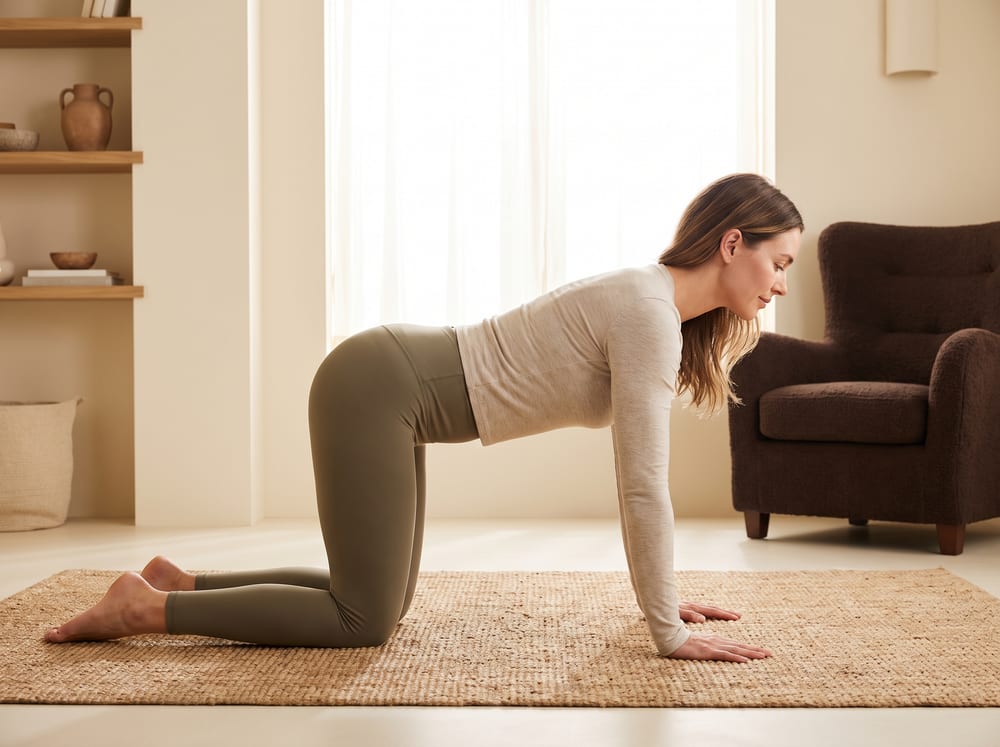
A man in his forties wearing plain black athletic shorts and a fitted t-shirt is on all fours on a light exercise mat in a sunlit room, mid-movement arching his mid-back gently upward toward the ceiling with his chin tucked, wrists stacked under his shoulders and knees under his hips, form controlled and relaxed. Mobility

Cat-Cow Spinal Flow

beginner
LongevityStress

A slow, breath-paced flexion and extension of the whole spine performed on hands and knees on the floor.

WhyCat-Cow moves the entire spine segmentally through flexion and extension, articulating each vertebral level rather than moving the spine as one stiff block. This nourishes the intervertebral discs, which have no direct blood supply and depend on this pumping motion to exchange fluid and nutrients, a mechanism that declines with age and sedentary time. It also mobilizes the lumbar and thoracic facet joints and gently loads the erector spinae and abdominals through their full length. Maintaining segmental spinal motion protects against the whole-spine stiffness that makes bending to tie shoes, getting off the floor, and reaching overhead feel difficult later in life.

How to do it
  1. Start on hands and knees with wrists under shoulders and knees under hips, spine in a neutral flat position.
  2. Inhale and drop your belly, lifting your chest and tailbone toward the ceiling as your gaze rises slightly (cow).
  3. Exhale and reverse: round your back toward the ceiling, tuck your chin and tailbone, pushing the floor away (cat).
  4. Move one vertebra at a time, letting your breath set a slow, even pace.
  5. Flow smoothly between the two positions without holding tension in the neck or shoulders.

Dose: 2 sets of 10 slow cycles, daily

⚠ If your wrists are sensitive, make fists or place a rolled towel under the heels of your hands. Keep the neck motion gentle and follow the spine rather than cranking the head back. Ease the range if you have acute back pain.

lumbar spinethoracic spinecervical spineintervertebral discserector spinae
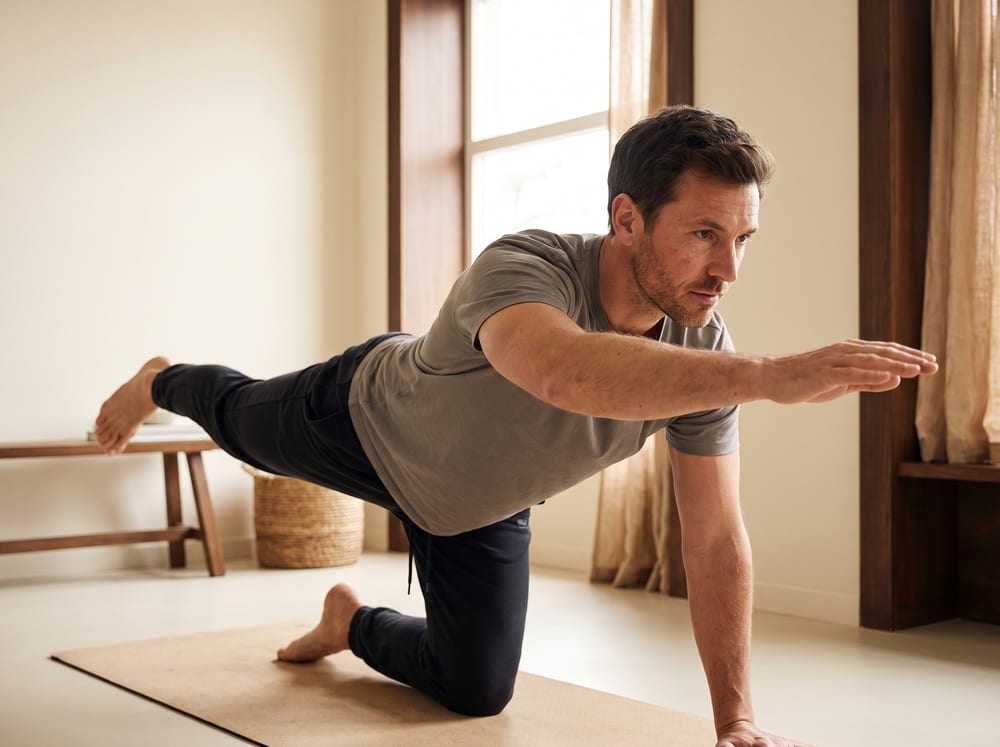
A warm, photorealistic editorial photograph in a bright calm room with a soft ivory and espresso palette, soft natural window light, 4:3 framing, no text or words anywhere. A man in his mid-thirties in modest neutral athletic wear is on hands and knees on a plain exercise mat, his back level and his head, spine, and pelvis in a squarely aligned, non-rotated orientation, slowly extending one arm forward and the opposite leg back in a controlled bird-dog with a calm, focused expression. Mobility

Cat-Cow to Bird-Dog Pelvic Mobility Flow

beginner
FertilityMenstrualCardio

A gentle hands-and-knees flow that mobilizes the spine and pelvis with cat-cow, then adds slow bird-dog reaches to lightly engage the deep core and glutes, promoting pelvic-region blood flow and control at an easy, non-taxing intensity.

WhyThis flow targets fertility support through mobility and circulation rather than intensity. Rhythmic flexion and extension of the spine in cat-cow moves the pelvis and low back through a full range and, paired with slow breathing, encourages blood flow through the pelvic and abdominal region while gently coordinating the deep core and pelvic-floor muscles. Adding bird-dog introduces light, controlled loading of the deep stabilizers and glutes without the systemic fatigue of hard training, which matters because the aim in fertility support is a moderate, sustainable stimulus, not exhaustion. The direct evidence that pelvic mobility work improves conception is limited and indirect, so the honest claim is improved spinal and pelvic mobility, core coordination, and local circulation, with any fertility benefit plausible but unproven. Men benefit equally from the core control and circulation. Because intensity is low, this pairs well as a daily warm-up or a recovery-day movement alongside strength and walking.

How to do it
  1. Come onto hands and knees with wrists under shoulders and knees under hips, spine in a long neutral line to start.
  2. Breathe in and let your belly drop as you lift your chest and tailbone into a gentle arch (cow), keeping the movement easy.
  3. Breathe out and round your spine toward the ceiling, tucking the tailbone and drawing the navel up (cat); flow slowly between the two for several breaths.
  4. Return to a neutral spine, brace your core lightly, and slowly extend your right arm forward and left leg back until both are roughly level with your torso (bird-dog).
  5. Keep your hips square and level, hold briefly without arching the low back, then return with control and repeat on the opposite arm and leg.
  6. Alternate sides smoothly, keeping the pace unhurried and the effort light throughout.

Dose: 1-2 rounds of 8-10 slow cat-cow cycles, then 6-8 bird-dog reaches per side; daily or on most days as a gentle warm-up or recovery movement

⚠ This is educational information for discussion with your clinician, not medical or fertility advice. Move within a pain-free range and avoid over-arching the low back during the reaches. Pad the knees if the surface is hard, and come onto fists or forearms if wrists are sensitive. If you are pregnant, keep the arch gentle and confirm hands-and-knees work is appropriate with your care team.

lumbar spinethoracic spinepelvisdeep coregluteals
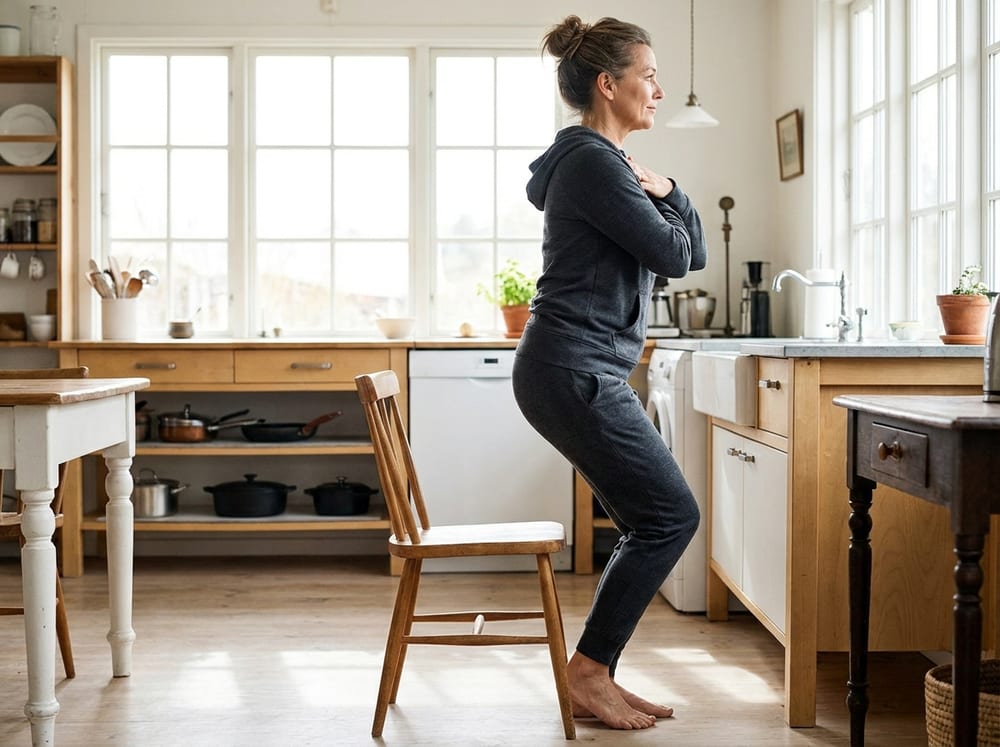
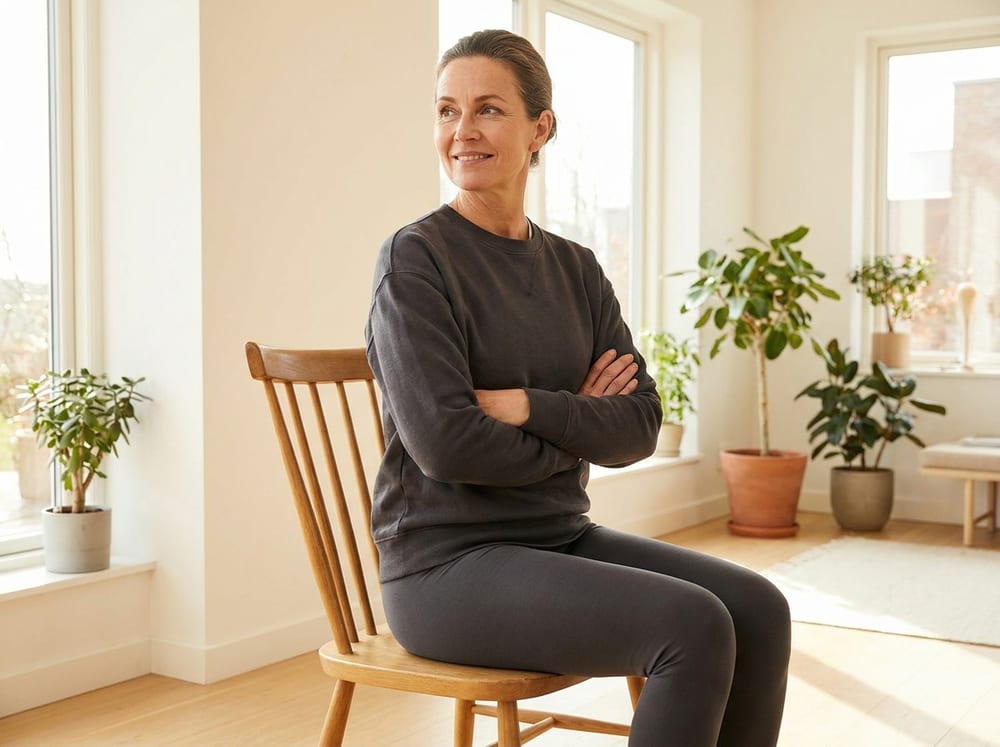
A middle-aged woman in neutral gray athletic wear rising from a wooden kitchen chair in a bright, sunlit room, arms crossed over her chest, weight driving through her heels, spine long and knees tracking over her toes in clean form. Strength

Chair Sit-to-Stand

beginner
StrengthLongevity

A foundational lower-body strength drill using a sturdy chair to build the leg power needed to rise from a seat, a car, or the floor without pushing off with your hands.

WhyThis movement loads the quadriceps, gluteus maximus, and hamstrings through the exact range you use dozens of times a day. After age 40 we lose fast-twitch type-II muscle fibers preferentially (sarcopenia), and those are the fibers that generate the concentric power to stand up. Repeatedly driving the hips up from a seated position recruits and hypertrophies those fibers, thickens tendon attachments at the knee and hip, and preserves the strength-to-bodyweight ratio that separates independent older adults from those who need assistance. It is one of the strongest single predictors of fall risk and all-cause mortality in aging research.

How to do it
  1. Sit tall at the front third of a sturdy chair, feet flat and shoulder-width apart, heels slightly behind your knees.
  2. Cross your arms over your chest or reach them forward as a counterweight.
  3. Lean your chest forward over your toes ('nose over toes'), then drive through your heels to stand fully upright, squeezing your glutes at the top.
  4. Reverse slowly, reaching your hips back and lowering under control for a count of three until you lightly touch the seat.
  5. Do not flop down; keep tension and immediately rise again.

Dose: 3 sets of 10 reps, 3x/week; progress by slowing the lowering phase to 4-5 seconds

⚠ Keep the chair against a wall so it cannot slide. If you cannot rise without hands, place a firm cushion on the seat to raise the starting height, then remove it as you get stronger. Stop if you feel sharp knee pain.

quadricepsgluteus maximushamstringscore
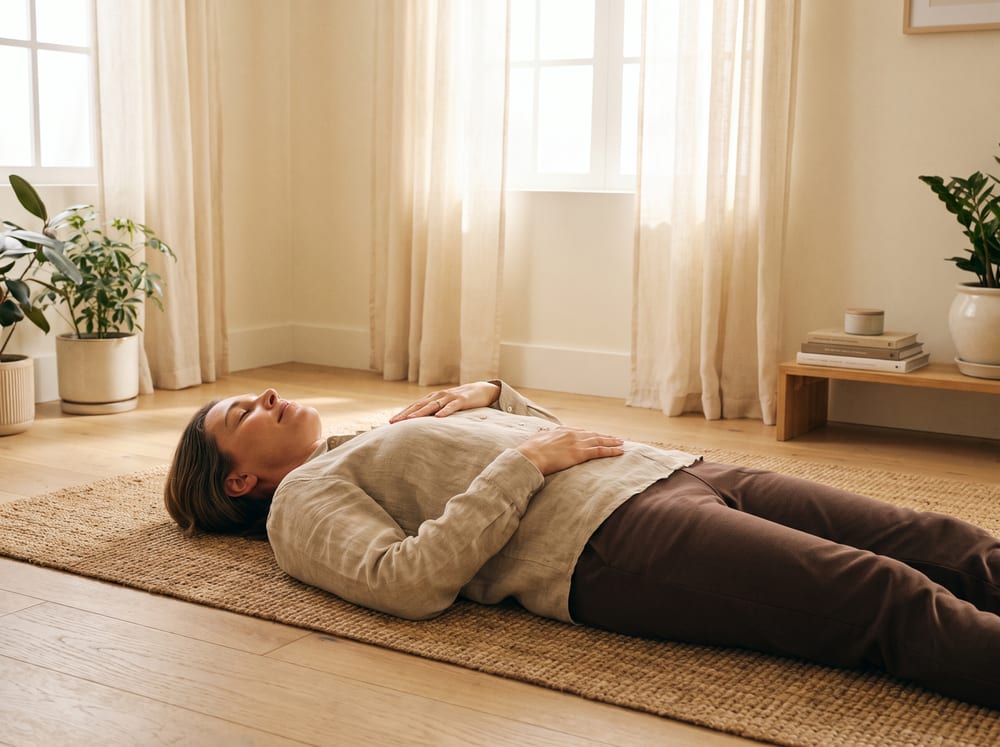
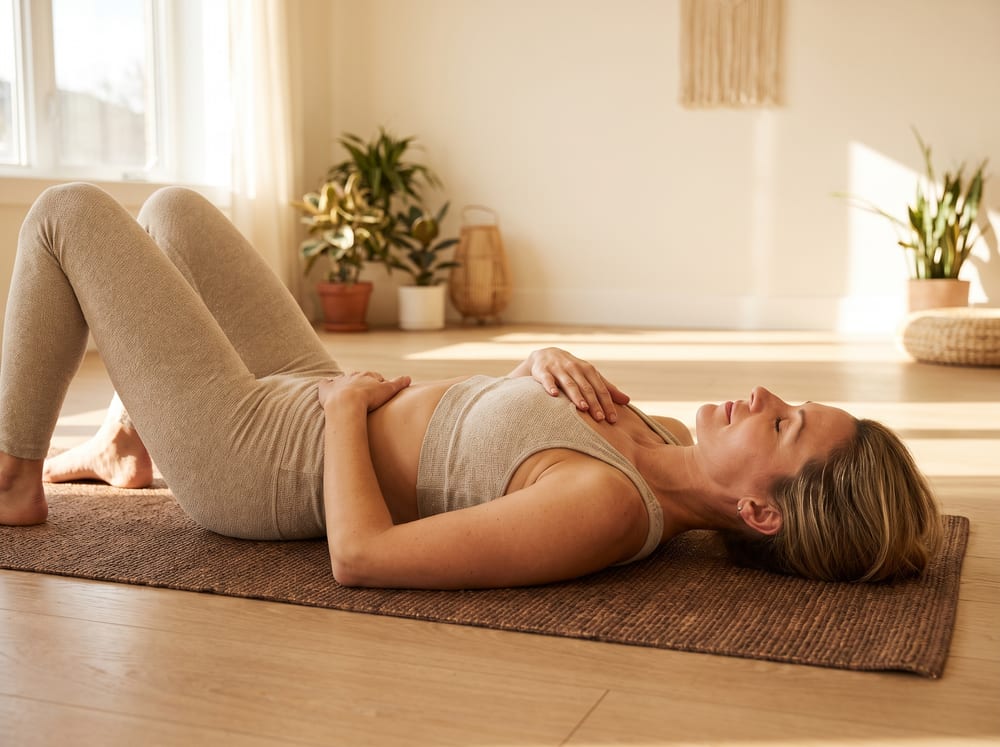
A warm, photorealistic editorial photograph in soft natural light with a warm ivory and espresso palette, 4:3 framing, no text or words anywhere: a healthy adult in their forties resting supine on a mat on a light wood floor in a bright, calm room, lying flat and level with the spine neutral and the body squarely aligned and not rotated, one hand on the belly and one on the chest for slow diaphragmatic breathing, face relaxed and calm, wearing modest neutral athletic wear, gentle window light warming the ivory walls. Flexibility

Diaphragmatic Belly Breathing with Wind-Relieving Hug

beginner
DigestiveStress

A calming supine sequence that first drives slow, deep belly breathing to move the diaphragm through the abdomen, then hugs the knees toward the chest to gently compress the gut and ease trapped gas.

WhyWith each slow diaphragmatic breath the diaphragm descends and pushes down on the abdominal organs, then rises and releases them, a rhythmic pressure change that acts like a gentle internal massage for the gut and is often used in pelvic-floor and constipation care to encourage motility. Slow deep breathing also strongly stimulates the vagus nerve and shifts the body into the parasympathetic, rest-and-digest state that supports normal gut function, an effect with reasonably good physiological support, while the direct effect on any specific digestive symptom is more modest and individual. Following the breathing with a knees-to-chest hug (the yoga wind-relieving pose, apanasana) flexes the hips and lumbar spine and presses the thighs into the abdomen, and this gentle compression of the colon is traditionally used to help move trapped gas and relieve bloating; the evidence here is mostly experiential rather than from trials. Together the two parts pair a mechanical nudge to the gut with a genuine down-regulation of the nervous system, which is why the sequence tends to feel settling.

How to do it
  1. Lie on your back with knees bent and feet flat, one hand resting on the chest and one on the belly.
  2. Breathe in slowly through the nose so the belly rises under your lower hand while the chest stays quiet, then exhale slowly and fully, letting the belly fall; repeat for 6 to 10 unhurried breaths.
  3. Keeping the breath slow, draw both knees up and wrap the arms around the shins or the backs of the thighs, shoulders and neck relaxed on the floor.
  4. On each exhale, hug the knees a little closer to the chest to a mild, comfortable compression across the belly and low back, holding for 5 to 8 slow breaths.
  5. Optionally rock a few inches side to side to massage the low back, then release the feet to the floor and rest for a breath or two before rising.

Dose: 1-2 rounds: 6-10 diaphragmatic breaths, then a 5-8 breath knees-to-chest hug; use as needed for bloating or nightly during wind-down

⚠ Educational content for discussion with your clinician, not medical advice, a prescription, or treatment for any digestive condition. Hold behind the thighs rather than over the shinbones if you have knee pain, and keep the hug gentle with any acute low-back or disc flare-up. In pregnancy, take the knees wide around the belly rather than pressing into the abdomen, and check the position with your clinician. Skip the deep hug soon after abdominal surgery or with a hernia. Stop if you feel pinching in the hips, low back, or reflux symptoms.

diaphragmabdomenlower backhipsgastrointestinal tract
A warm, photorealistic editorial photograph in soft natural light with a warm ivory and espresso palette, 4:3 framing, no text or words anywhere: a healthy adult in their forties resting supine on a mat on a light wood floor in a bright, calm room, lying flat and level with the spine neutral and the body squarely aligned and not rotated, one hand on the belly and one on the chest for slow diaphragmatic breathing, face relaxed and calm, wearing modest neutral athletic wear, gentle window light warming the ivory walls. Flexibility

Diaphragmatic Belly Breathing with Wind-Relieving Hug

beginner
DigestiveStress

A calming supine sequence that first drives slow, deep belly breathing to move the diaphragm through the abdomen, then hugs the knees toward the chest to gently compress the gut and ease trapped gas.

WhyWith each slow diaphragmatic breath the diaphragm descends and pushes down on the abdominal organs, then rises and releases them, a rhythmic pressure change that acts like a gentle internal massage for the gut and is often used in pelvic-floor and constipation care to encourage motility. Slow deep breathing also strongly stimulates the vagus nerve and shifts the body into the parasympathetic, rest-and-digest state that supports normal gut function, an effect with reasonably good physiological support, while the direct effect on any specific digestive symptom is more modest and individual. Following the breathing with a knees-to-chest hug (the yoga wind-relieving pose, apanasana) flexes the hips and lumbar spine and presses the thighs into the abdomen, and this gentle compression of the colon is traditionally used to help move trapped gas and relieve bloating; the evidence here is mostly experiential rather than from trials. Together the two parts pair a mechanical nudge to the gut with a genuine down-regulation of the nervous system, which is why the sequence tends to feel settling.

How to do it
  1. Lie on your back with knees bent and feet flat, one hand resting on the chest and one on the belly.
  2. Breathe in slowly through the nose so the belly rises under your lower hand while the chest stays quiet, then exhale slowly and fully, letting the belly fall; repeat for 6 to 10 unhurried breaths.
  3. Keeping the breath slow, draw both knees up and wrap the arms around the shins or the backs of the thighs, shoulders and neck relaxed on the floor.
  4. On each exhale, hug the knees a little closer to the chest to a mild, comfortable compression across the belly and low back, holding for 5 to 8 slow breaths.
  5. Optionally rock a few inches side to side to massage the low back, then release the feet to the floor and rest for a breath or two before rising.

Dose: 1-2 rounds: 6-10 diaphragmatic breaths, then a 5-8 breath knees-to-chest hug; use as needed for bloating or nightly during wind-down

⚠ Educational content for discussion with your clinician, not medical advice, a prescription, or treatment for any digestive condition. Hold behind the thighs rather than over the shinbones if you have knee pain, and keep the hug gentle with any acute low-back or disc flare-up. In pregnancy, take the knees wide around the belly rather than pressing into the abdomen, and check the position with your clinician. Skip the deep hug soon after abdominal surgery or with a hernia. Stop if you feel pinching in the hips, low back, or reflux symptoms.

diaphragmabdomenlower backhipsgastrointestinal tract
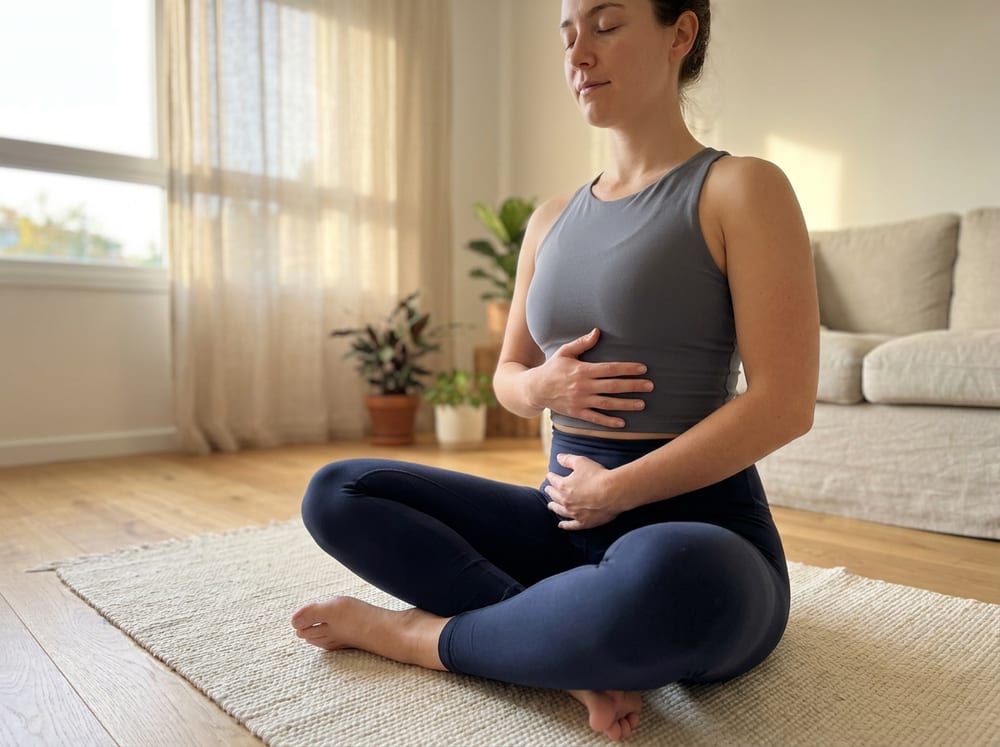
A person sitting upright cross-legged on a light mat in a calm, well-lit room, wearing neutral navy leggings and a fitted top, one hand resting on the lower ribs and one on the lower belly, eyes softly closed in focused breathing with a relaxed jaw and tall spine, gentle natural light from a window behind. Strength

Diaphragmatic Pelvic-Floor Coordination Drill

intermediate
SexualStress

A focused breath-and-lift practice that syncs the diaphragm with the pelvic floor, training both quick, strong contractions and full relaxation so the muscles work on demand rather than staying chronically clenched or weak.

WhyThe diaphragm and pelvic floor form the top and bottom of the abdominal canister and are meant to move together, the pelvic floor descending on the inhale and lifting on the exhale. Chronic stress and clenching break this rhythm, leaving the pelvic floor either weak or over-gripped, both of which impair sexual function: in men a coordinated, strong yet supple pelvic floor underlies rigid erections and ejaculatory control, and in women it drives orgasmic contraction strength and reduces pain. Training two distinct qualities is key here, a fast, maximal 'quick flick' that recruits the fast-twitch fibers used at climax, and a slow endurance lift with a deliberate, complete release afterward that rebuilds the relaxation half of the cycle most people have lost. Anchoring every rep to the breath keeps the recruitment true to the pelvic floor rather than substituting the glutes or breath-holding, and grooving this pattern also calms the nervous system, since slow diaphragmatic breathing is itself a direct parasympathetic on-ramp for arousal.

How to do it
  1. Sit tall or lie on your back with knees bent, one hand on the lower ribs and one low on the belly, spine neutral.
  2. Inhale slowly through the nose, feeling the lower ribs widen and the belly and pelvic floor gently expand and drop downward.
  3. On a slow exhale, gently lift and draw the pelvic floor up and in (as if stopping the flow of urine and lifting a marble), hold for a slow count of five, then fully let go for a full breath.
  4. After several slow lifts, do a set of 'quick flicks': a fast, firm pelvic-floor squeeze and an immediate, complete release, one per second.
  5. Between every contraction, confirm a total release so you feel the muscles go slack; the relaxation is a trained skill, not an afterthought.
  6. Keep the glutes, thighs, and jaw relaxed and never hold your breath or push down; if you feel bearing-down pressure, stop and reset.

Dose: 10 slow 5-second lifts with full release, then 10 quick flicks; 2-3 rounds daily

⚠ If you have pelvic pain, urgency, or a history of an overactive pelvic floor, emphasize the release phase and reduce the strong contractions, or work with a pelvic-floor physical therapist. Bearing down (pushing out instead of lifting) is counterproductive and should be avoided; clear pelvic-floor training during and after pregnancy with your provider.

pelvic floordiaphragmdeep corelevator anitransversus abdominis
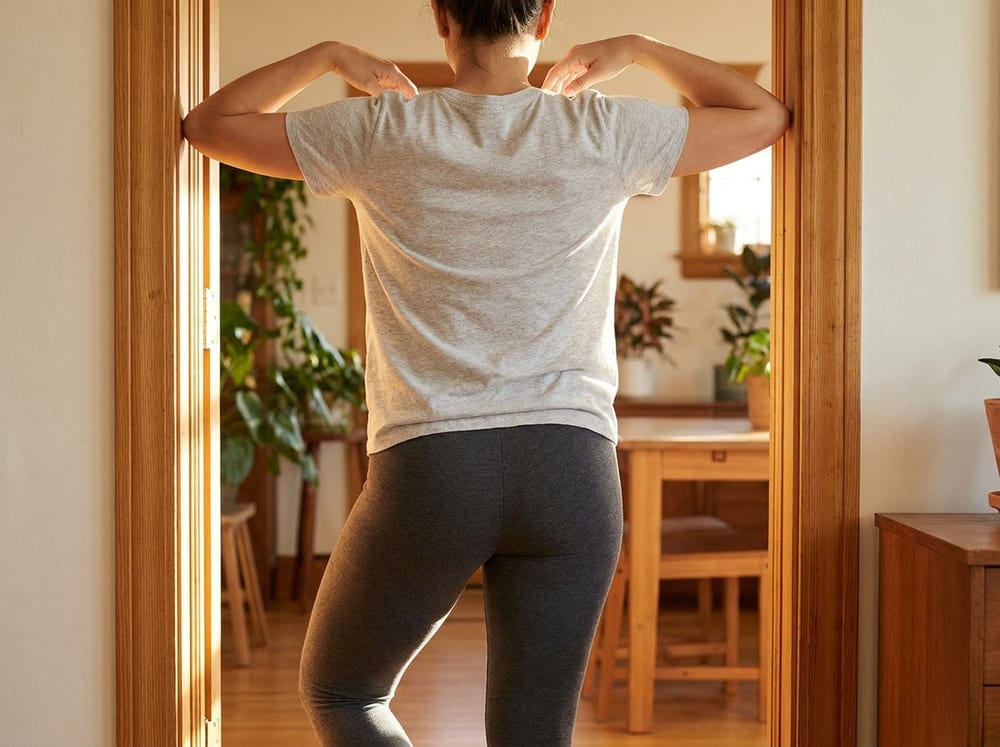
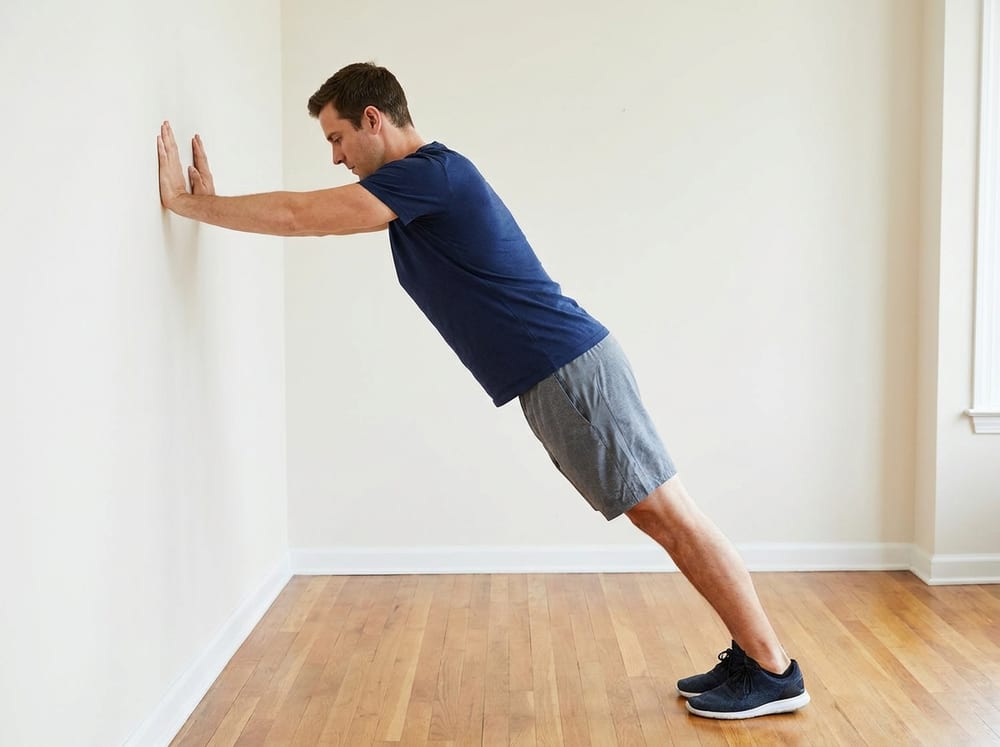
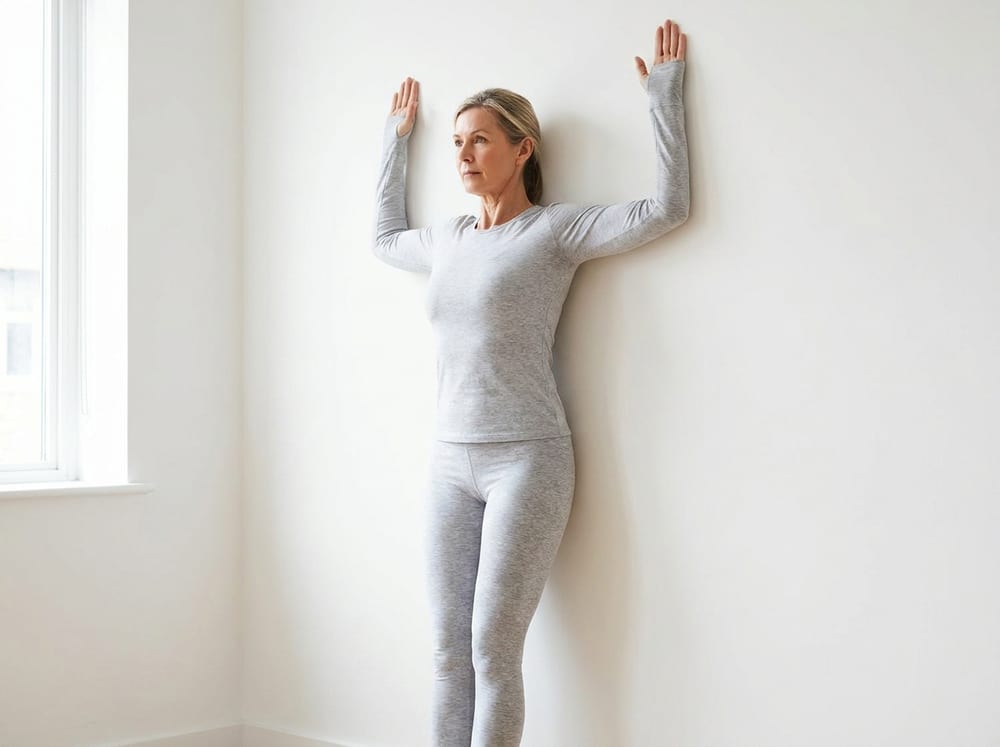
A person standing in a bright doorway of a home, wearing plain charcoal leggings and a light heather T-shirt, both forearms resting flat against the door frame at shoulder height with elbows bent, chest gently pressing forward in a staggered stance, posture tall with ribs down, warm natural daylight filling the hallway behind them. Flexibility

Doorway Chest and Shoulder Opener

beginner
LongevityStress

A standing stretch using a doorway or wall corner to lengthen the chest and front-of-shoulder tissues that tighten from desk work and phone use, reversing rounded-shoulder posture.

WhyHours of forward-reaching activity shorten the pectoralis major and minor and the anterior shoulder capsule while lengthening and weakening the mid-back. This adaptive shortening pulls the shoulders forward and tips the head into protraction, which over time reduces shoulder external rotation, compresses the rotator cuff during overhead reach, and stiffens the thoracic spine. Stretching the pecs across a doorway restores resting muscle length and lets the shoulder blade sit back on the ribcage, which mechanically opens the subacromial space. For aging adults this protects against impingement, preserves the overhead reach needed for dressing and reaching shelves, and helps offset the kyphotic posture that compromises breathing capacity.

How to do it
  1. Stand in a doorway and place your forearms on the frame with elbows bent about 90 degrees, roughly at shoulder height.
  2. Set one foot slightly ahead of the other for a stable split stance.
  3. Gently shift your weight forward through the doorway until you feel a comfortable stretch across the front of the chest and shoulders.
  4. Keep your ribs down and low back neutral, do not arch the lower back to reach further.
  5. To bias the lower chest, raise the elbows a few inches higher; to bias the upper chest, lower them, and breathe slowly into the stretch.

Dose: 3 holds of 30 seconds, 1-2x/day, daily

⚠ Ease off if you feel any pinching in the front of the shoulder or tingling in the arm; the stretch should be felt in the chest, not the joint. Avoid if you have a history of shoulder dislocation without clearing it with a clinician.

pectoralis majorpectoralis minoranterior deltoidanterior shoulder capsule
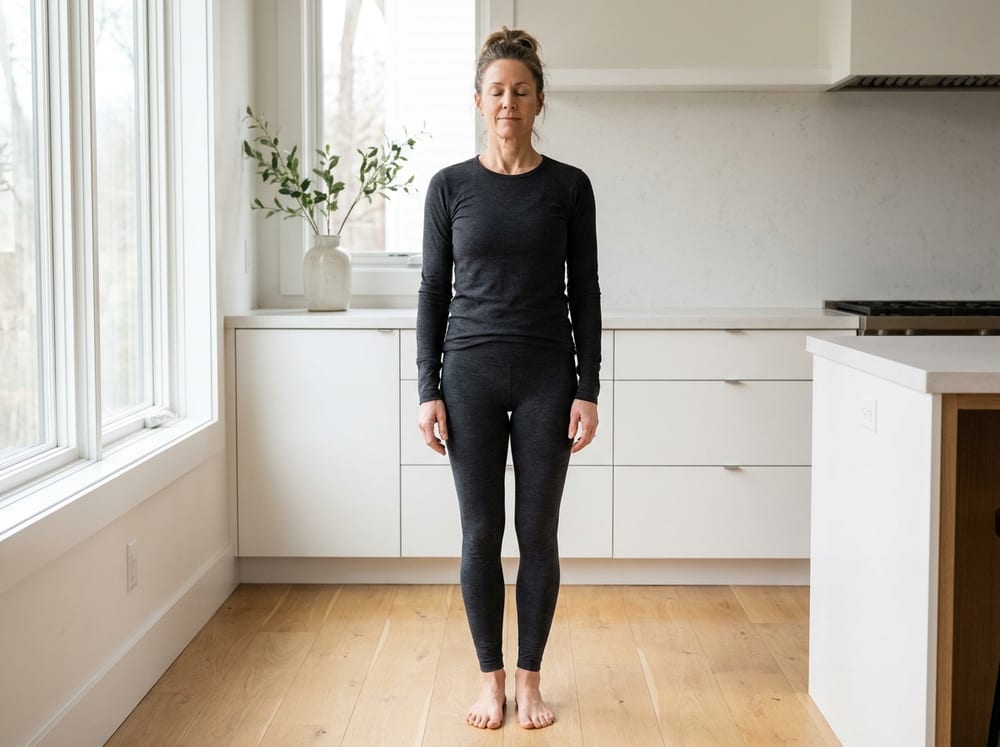
A middle-aged woman in neutral gray athletic wear stands barefoot on a hardwood floor beside a white kitchen counter, feet together and touching, eyes gently closed, arms hanging relaxed at her sides, spine tall, bathed in bright natural window light. Balance

Feet-Together Stand with Eyes Closed

beginner
LongevityCognitive

A foundational static-balance drill: stand with feet touching side by side, then close the eyes to force the body to rely on the vestibular and proprioceptive systems instead of vision.

WhyStanding quiet-balance is maintained by three inputs: the eyes, the inner-ear vestibular organs, and proprioceptors (position sensors) in the ankle, knee, and hip. Closing the eyes removes the visual input, so the vestibular system and the muscle-spindle proprioceptors in the calves and small foot muscles must up-regulate to keep the body's center of mass over its base. With aging these sensors dull and the ankle strategy that makes tiny corrective sway adjustments weakens, which is a leading contributor to falls. Repeatedly challenging the eyes-closed condition retrains the ankle and foot stabilizers and sharpens the vestibulospinal reflex, buying back the automatic postural control needed to catch a stumble before it becomes a fall.

How to do it
  1. Stand next to a wall or countertop so you can reach out and touch it instantly if needed, but do not lean on it.
  2. Place your feet together so the inside edges touch, arms relaxed at your sides.
  3. Fix your eyes on a spot on the wall, take a steady breath, then softly close your eyes.
  4. Stay tall through the crown of your head and let your ankles make small, quiet corrections rather than stiffening.
  5. Hold for the target time, then open your eyes; reach for the wall the instant you feel a real loss of balance.

Dose: 3 holds of 20-30 seconds, 4-5 days per week; progress the hold time before adding difficulty

⚠ Always perform within arm's reach of a solid surface. Skip the eyes-closed version if you have uncontrolled vertigo, and open your eyes at the first sign of true unsteadiness rather than pushing through.

anklesfeetcorevestibular systemproprioception
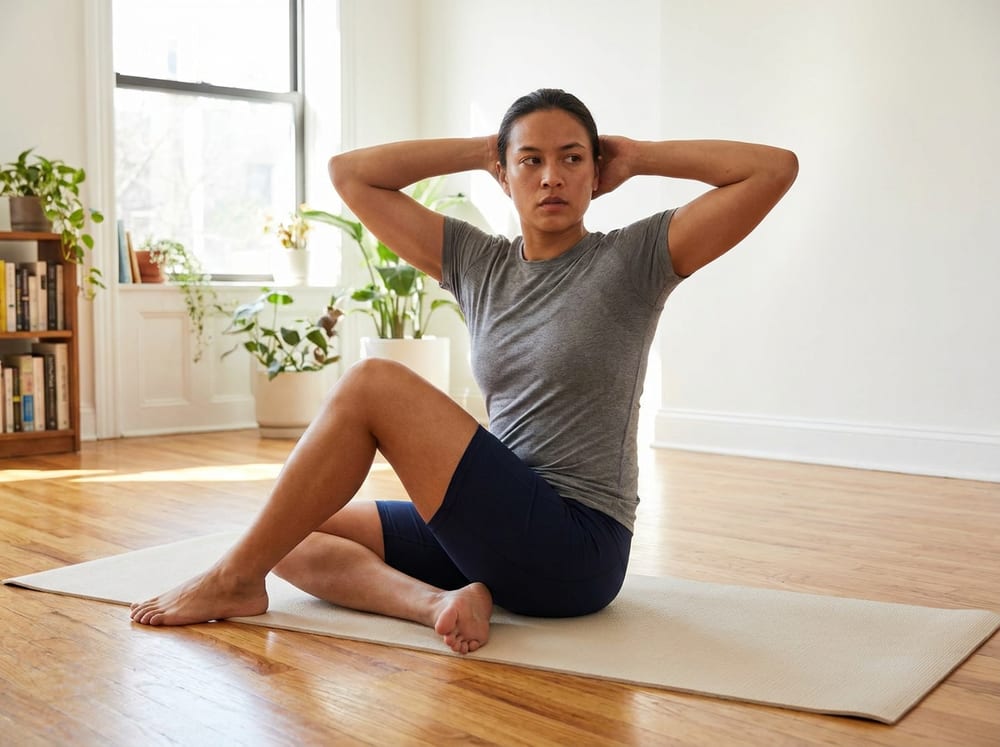
A person sitting on a light mat on a hardwood floor in a 90-90 leg position, wearing neutral navy shorts and a plain fitted top, spine tall and hands laced behind the head, ribcage rotating smoothly to one side while the hips stay square, bright natural light streaming across a tidy room. Flexibility

Floor-Seated Thoracic Rotation

intermediate
LongevityStress

A seated rotational mobility drill that restores twisting range through the mid-back, one of the first movements lost with age and the hardest to recover through stretching alone.

WhyThe thoracic spine is built to rotate, but rib stiffness, disc dehydration, and postural kyphosis progressively rob it of rotational range as we age. When the mid-back cannot rotate, the demand transfers to the lumbar spine (which is built for stability, not twist) and the shoulders, driving both low-back strain and shoulder overuse when reaching or looking over the shoulder while driving. Actively rotating from a fixed lower body isolates the thoracic segments and the intercostal and oblique tissues between the ribs, restoring the segmental glide of the costovertebral joints. Recovering this range improves reaching, dressing, backing up a car, and rib expansion for fuller breathing, all functionally critical in later decades.

How to do it
  1. Sit on the floor in a 90-90 position: one leg bent in front, the other bent out to the side, both knees at about 90 degrees, so the pelvis is anchored.
  2. Sit tall, lengthening the spine as if a string lifts the crown of your head.
  3. Place your hands behind your head or cross them over your chest to keep the arms out of the movement.
  4. Exhale and rotate your ribcage and head slowly toward the front leg, turning from the mid-back, not the neck or low back.
  5. Return to center on an inhale and repeat, keeping the pelvis and hips still throughout so the twist stays in the thoracic spine.

Dose: 2 sets of 8-10 controlled rotations per side, holding the end range 2 seconds, 4-5x/week

⚠ Rotate only to a comfortable end range, never force the twist. If you feel it pinch in the low back, you are rotating from the lumbar spine, reset your posture taller and rotate less far.

thoracic spineintercostalsobliquescostovertebral joints
A warm, photorealistic editorial photograph in soft natural light with a warm ivory and espresso palette, 4:3 framing, no text or words anywhere: a woman in her early thirties in modest neutral olive leggings and a fitted oatmeal top on hands and knees on a mat in a bright calm room, in a gentle neutral tabletop position with a long level spine; her torso is upright and squarely oriented to the camera, aligned and not tilted or rotated, wrists under shoulders and hips over knees, face relaxed and gaze soft toward the mat. Mobility

Gentle Pelvic Tilt and Cat-Cow Rocking

beginner
MenstrualStress

A slow, small-range rocking of the pelvis and spine on hands and knees, flowing between a gentle rounding and a gentle arching in rhythm with the breath, kept deliberately low in effort to mobilize the low back and pelvis without strain during menstruation.

WhyRepeated small pelvic tilts move the lumbar spine and sacroiliac region through a comfortable arc and rhythmically lengthen and release the low-back and hip-flexor tissues that tend to tighten and guard when the uterus is cramping. Slow, oscillatory movement like this is thought to reduce protective muscle tension and can be a distraction from pain, and pairing each phase with the breath encourages the longer, calmer exhalations that raise vagal tone. The mechanism for relief is muscular and neural comfort rather than any direct effect on the uterus; there is no strong evidence it changes cramp physiology. Small studies of gentle mobility and yoga for period pain are encouraging but limited and inconsistent, so treat this as a gentle, low-risk way to feel looser and calmer, not as a proven remedy. Keeping the range small and pain-free is what makes it appropriate on a crampy day.

How to do it
  1. Come onto hands and knees with wrists under shoulders and knees under hips, spine in a comfortable neutral position.
  2. As you exhale, gently tuck the tailbone and draw the belly up to round the low back a small, comfortable amount.
  3. As you inhale, slowly release and let the pelvis tip the other way so the low back softly arches, keeping the movement small and the neck long.
  4. Flow between the two shapes slowly, letting the pelvis lead and the spine follow one segment at a time, breathing with the movement.
  5. Keep the range well within comfort and stop short of any pinch or sharp sensation, staying focused on the low back and pelvis rather than forcing the upper back.
  6. Slow the rocking gradually and return to a neutral, still position for a few easy breaths before coming out.

Dose: 1 to 2 rounds of 8 to 12 slow rocks, once or twice a day as needed through the period

⚠ This is educational content for discussion with a clinician, not medical advice or a prescription. Pad the knees and keep the movement small and comfortable; skip any range that pinches the low back or wrists, and rest the forearms on a raised surface if the wrists complain. Ease off with acute low-back or wrist injury. Seek medical care for period pain that is severe, worsening, new, or comes with fever, unusually heavy bleeding, faintness, or pain outside your normal pattern.

lumbar spinepelvissacroiliac regionhip flexorsabdominal wall
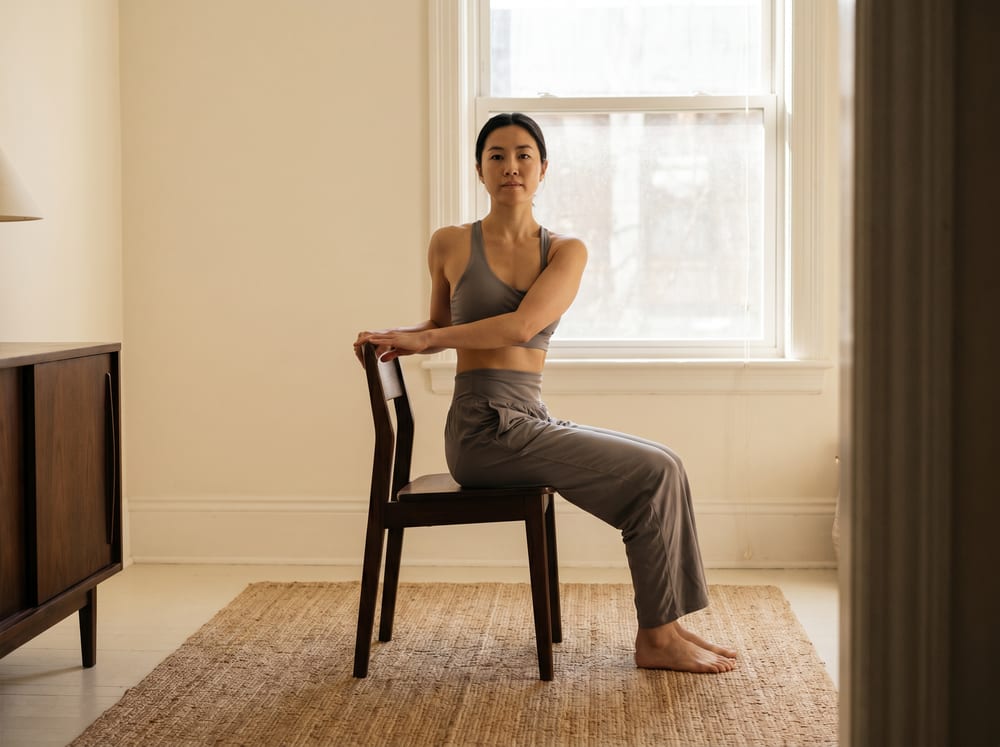
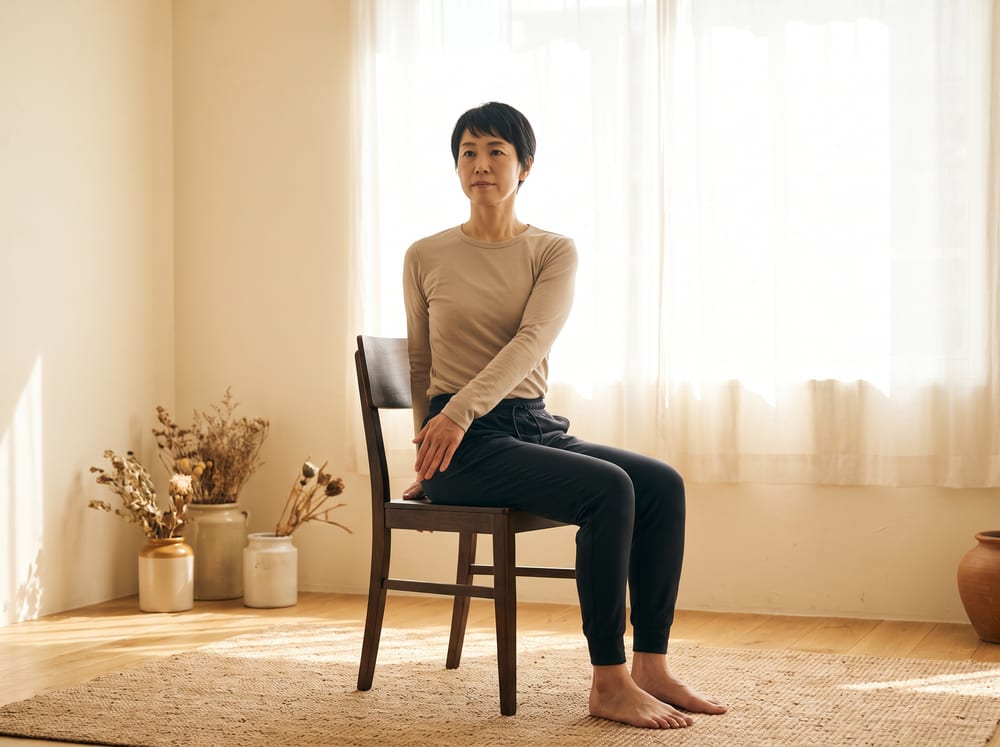
A warm, photorealistic editorial photograph in soft natural light with a warm ivory and espresso palette, 4:3 framing, no text or words anywhere: a healthy adult in their forties seated upright and fully vertical on a firm wooden chair on a mat in a bright, calm room, spine tall and the head level, performing only a small gentle turn of the upper body while the hips and head stay squarely upright and not rotated, hands resting lightly for guidance, wearing modest neutral athletic wear, soft window light across warm ivory walls. Flexibility

Gentle Seated and Supine Spinal Twists

beginner
DigestiveStress

A pair of slow, breath-led rotations, one upright in a chair and one lying on the back, that gently rotate the trunk to mobilize the abdomen and lower spine and invite a calmer, more settled gut.

WhyA slow trunk rotation lengthens the oblique abdominals, the quadratus lumborum, and the deep spinal rotators, and the accompanying change in intra-abdominal pressure gives the gut a mild mechanical massage as the abdominal wall moves over it. Traditional movement practice holds that this encourages peristalsis and helps move trapped gas; the direct evidence in humans is limited and largely mechanistic, so this is best framed as a gentle, plausible aid to comfort rather than a proven treatment. The more reliable benefit is neurological: pairing an unhurried twist with long, slow exhales lengthens the side of the ribcage and supports diaphragmatic breathing, which raises vagal tone and shifts the body toward the parasympathetic, rest-and-digest state in which the gut works best. Because the twist is small, passive, and led entirely by the breath, it eases the abdomen and low back without straining the spine.

How to do it
  1. Seated version: sit tall on a firm chair, feet flat and hip-width, crown of the head lifting so the spine is long and upright.
  2. Inhale to grow taller, then on a slow exhale rotate gently from the waist to the right, resting the hands lightly on the chair or thigh only to guide, not to crank.
  3. Hold at a mild, comfortable turn for 3 to 5 slow breaths, letting each exhale invite a fraction more ease, then return to center and repeat to the left.
  4. Supine version: lie on your back, draw both knees up, arms out in a T with palms down and both shoulders grounded.
  5. On an exhale, let both knees drop slowly toward the floor on one side to a mild stretch, keep the shoulders down, breathe for 5 slow breaths, then float back to center and change sides.

Dose: 1-2 rounds per side of each version, 3-5 slow breaths per hold; use seated after meals and supine as part of a wind-down

⚠ Educational movement for discussion with your clinician, not medical advice or a prescription. Keep any twist small and passive, and never force the range; ease out if you feel pinching in the spine. Go gently or skip on a very full stomach and with reflux. If you have a disc problem, sciatica, spinal instability, osteoporosis, a recent abdominal surgery, or are pregnant, check the appropriate version with your clinician and avoid deep or forceful rotation. Stop with any sharp, shooting, or radiating sensation.

obliquesabdomenlumbar spinethoracic spinequadratus lumborum
A warm, photorealistic editorial photograph in soft natural light with a warm ivory and espresso palette, 4:3 framing, no text or words anywhere: a healthy adult in their forties seated upright and fully vertical on a firm wooden chair on a mat in a bright, calm room, spine tall and the head level, performing only a small gentle turn of the upper body while the hips and head stay squarely upright and not rotated, hands resting lightly for guidance, wearing modest neutral athletic wear, soft window light across warm ivory walls. Flexibility

Gentle Seated and Supine Spinal Twists

beginner
DigestiveStress

A pair of slow, breath-led rotations, one upright in a chair and one lying on the back, that gently rotate the trunk to mobilize the abdomen and lower spine and invite a calmer, more settled gut.

WhyA slow trunk rotation lengthens the oblique abdominals, the quadratus lumborum, and the deep spinal rotators, and the accompanying change in intra-abdominal pressure gives the gut a mild mechanical massage as the abdominal wall moves over it. Traditional movement practice holds that this encourages peristalsis and helps move trapped gas; the direct evidence in humans is limited and largely mechanistic, so this is best framed as a gentle, plausible aid to comfort rather than a proven treatment. The more reliable benefit is neurological: pairing an unhurried twist with long, slow exhales lengthens the side of the ribcage and supports diaphragmatic breathing, which raises vagal tone and shifts the body toward the parasympathetic, rest-and-digest state in which the gut works best. Because the twist is small, passive, and led entirely by the breath, it eases the abdomen and low back without straining the spine.

How to do it
  1. Seated version: sit tall on a firm chair, feet flat and hip-width, crown of the head lifting so the spine is long and upright.
  2. Inhale to grow taller, then on a slow exhale rotate gently from the waist to the right, resting the hands lightly on the chair or thigh only to guide, not to crank.
  3. Hold at a mild, comfortable turn for 3 to 5 slow breaths, letting each exhale invite a fraction more ease, then return to center and repeat to the left.
  4. Supine version: lie on your back, draw both knees up, arms out in a T with palms down and both shoulders grounded.
  5. On an exhale, let both knees drop slowly toward the floor on one side to a mild stretch, keep the shoulders down, breathe for 5 slow breaths, then float back to center and change sides.

Dose: 1-2 rounds per side of each version, 3-5 slow breaths per hold; use seated after meals and supine as part of a wind-down

⚠ Educational movement for discussion with your clinician, not medical advice or a prescription. Keep any twist small and passive, and never force the range; ease out if you feel pinching in the spine. Go gently or skip on a very full stomach and with reflux. If you have a disc problem, sciatica, spinal instability, osteoporosis, a recent abdominal surgery, or are pregnant, check the appropriate version with your clinician and avoid deep or forceful rotation. Stop with any sharp, shooting, or radiating sensation.

obliquesabdomenlumbar spinethoracic spinequadratus lumborum
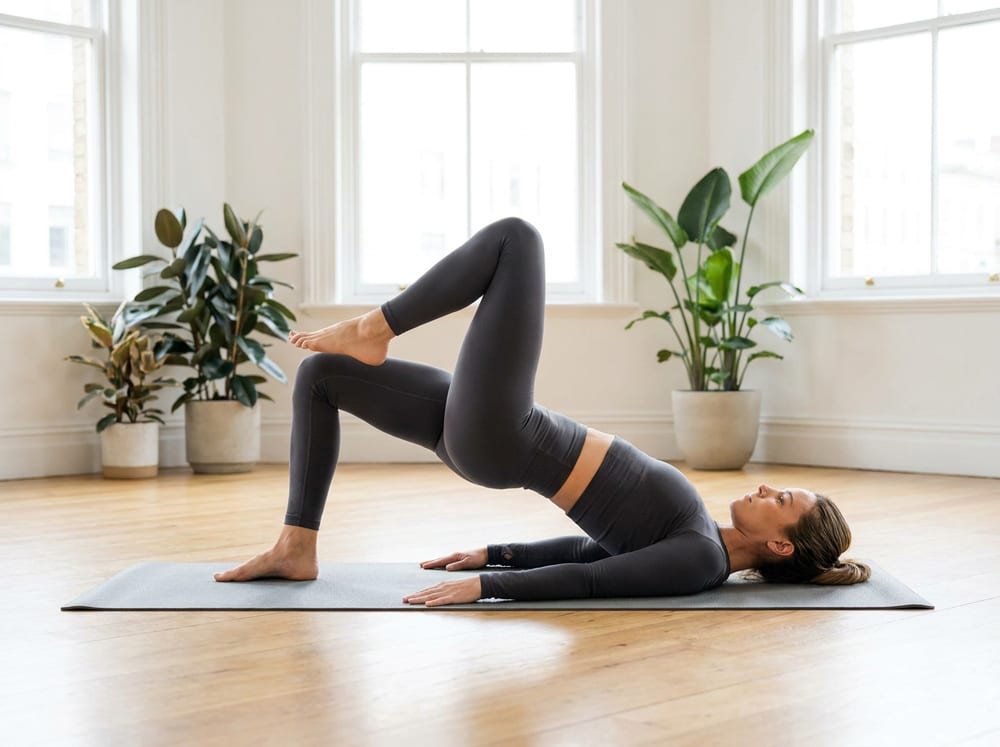
A woman in neutral charcoal leggings and a fitted top lying on a yoga mat in bright natural light, hips lifted into a bridge with body straight from knees to shoulders, one knee drawn up in a march while her pelvis stays perfectly level. Strength

Glute Bridge with March

intermediate
StrengthSexualLongevity

A floor-based posterior-chain and core exercise that strengthens the glutes and hamstrings while training the deep trunk muscles to resist rotation, building the hip strength that protects the low back.

WhyThe gluteus maximus is the largest and most powerful muscle in the body, yet it becomes weak and 'dormant' in people who sit for long hours, forcing the low back and hamstrings to compensate and driving chronic back pain. Bridging directly loads the glutes and hamstrings in hip extension, the same action that powers walking, stair climbing, and standing from a chair. Adding the march turns it into an anti-rotation core exercise: when one foot lifts, the deep abdominal wall and pelvic stabilizers must fire to keep the pelvis level. This transverse-plane control is exactly what fails during a trip or misstep, so training it directly reduces fall and injury risk as we age.

How to do it
  1. Lie on your back with knees bent, feet flat and hip-width apart, arms resting at your sides.
  2. Press through your heels and squeeze your glutes to lift your hips until your body forms a straight line from knees to shoulders.
  3. Without letting your hips drop or tilt, slowly lift one foot a few inches off the floor, driving that knee toward your chest.
  4. Lower the foot with control and repeat on the other side; that is one rep.
  5. Keep your ribs down and belly braced the entire time so the pelvis stays perfectly level.

Dose: 3 sets of 8 marches per side, 3-4x/week; hold the bridge higher and pause 2 seconds per lift to progress

⚠ If you feel this in your low back or hamstrings cramping instead of your glutes, lower the bridge height and focus on the glute squeeze. Keep the movement slow so the hips never rock side to side.

gluteus maximushamstringstransverse abdominispelvic stabilizers
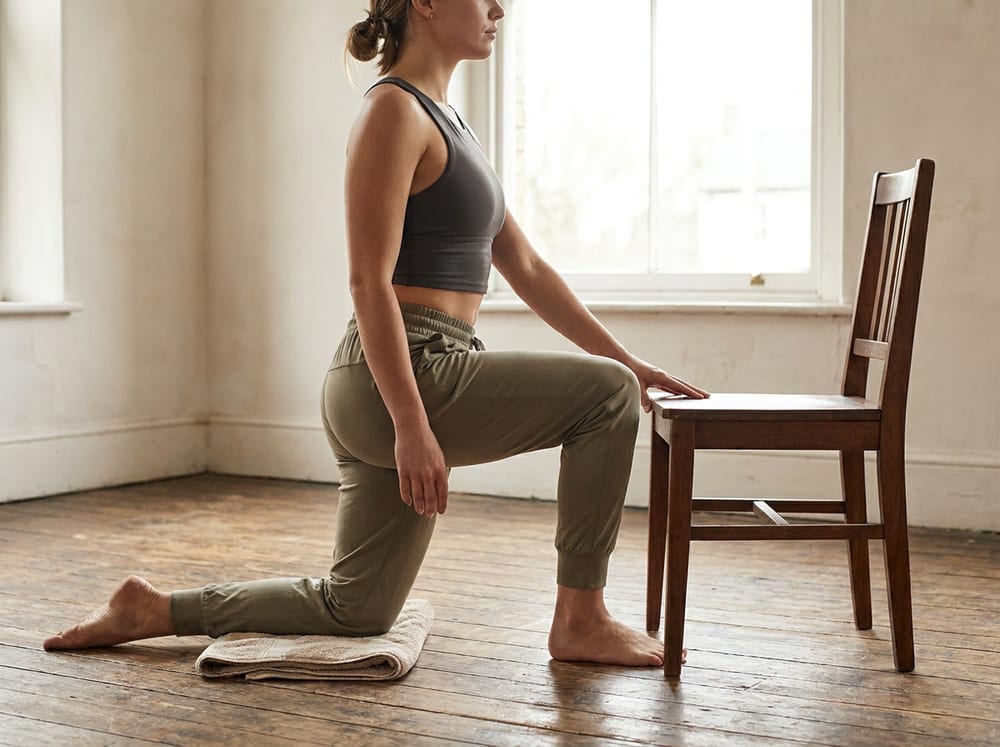
A person in a half-kneeling lunge on a wooden floor beside a simple wooden chair, wearing neutral olive joggers and a fitted gray top, back knee cushioned on a folded towel, tailbone tucked and torso tall, hips shifted gently forward with one hand resting lightly on the chair seat for balance, soft bright daylight from a nearby window. Flexibility

Half-Kneeling Hip Flexor Stretch with Posterior Tilt

intermediate
LongevitySexual

A kneeling lunge stretch that targets the deep hip flexors, using a chair for balance, to reverse the tightness that chronic sitting builds into the front of the hip.

WhyThe iliopsoas and rectus femoris cross the front of the hip and sit in a shortened position for most of a seated day. Over years this adaptive shortening produces a hip flexion contracture that prevents full hip extension during walking. The body compensates by over-arching the lumbar spine and taking shorter steps, both of which accelerate low-back wear and reduce walking speed, a strong predictor of independence in aging. Adding an active posterior pelvic tilt (tucking the tailbone) targets the psoas specifically rather than just leaning forward, and lengthening these tissues restores the terminal hip extension that lets the glutes fire properly for a powerful, upright stride.

How to do it
  1. Kneel on one knee (padded) with the other foot planted flat in front, both knees at roughly 90 degrees, a chair beside you for light hand support.
  2. Before moving, tuck your tailbone under to flatten the low-back arch (a posterior pelvic tilt) and squeeze the glute of the kneeling leg.
  3. Keeping that tilt, shift your hips gently forward until you feel a stretch at the front of the hip and top of the thigh of the kneeling leg.
  4. Stay tall through the torso, do not let the low back arch or the front knee drift past the toes.
  5. For a deeper rectus femoris stretch, reach back and hold the kneeling-leg ankle to bend that knee, using the chair for balance.

Dose: 3 holds of 30 seconds per side, 4-5x/week

⚠ Keep a hand on the chair when reaching for the ankle to avoid tipping. Pad the kneeling knee. Skip the knee-flexed variation if you have knee pain at the kneecap.

iliopsoasrectus femoriship flexorsanterior hip capsule
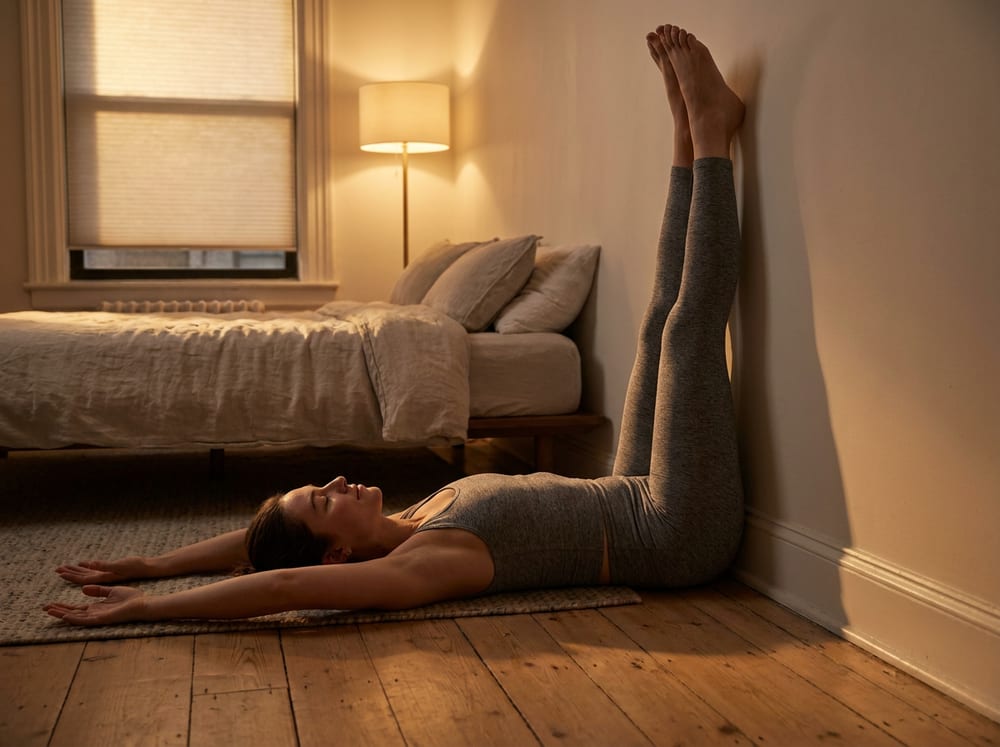
A person lying on their back on a light oak floor in a calm, dimly lit bedroom, hips close to a plain white wall and both legs resting straight up against it, arms relaxed open at their sides with palms up, wearing neutral heather-gray leggings and a fitted tank top, eyes closed and face soft, warm low evening light coming from a nearby lamp. Flexibility

Legs-Up-the-Wall (Viparita Karani)

beginner
SleepStressCardio

A quiet, fully supported inversion done with the hips near a wall and the legs resting vertically up it, draining the lower limbs and downshifting the nervous system before bed.

WhyElevating the legs above the heart lets gravity return pooled venous blood and interstitial fluid out of the calves and feet, decongesting tissues that swell after a day of standing and easing the heavy, restless-leg feeling that fragments sleep. More importantly, the mild inversion and the passive, unloaded posture stimulate the baroreceptors in the neck and chest and shift autonomic tone toward the parasympathetic (rest-and-digest) branch, which lowers heart rate and blood pressure and quiets the sympathetic arousal that keeps people wired at bedtime. Because the spine is neutral and the whole body is supported by the floor and wall, no muscle has to work, so it is one of the few 'stretches' that is really a nervous-system reset that primes the body for sleep onset.

How to do it
  1. Sit sideways next to a clear wall with one hip touching the baseboard, knees bent.
  2. Roll onto your back as you swing both legs up the wall, shuffling your seat close so your sitting bones rest near or against the wall.
  3. Let your arms fall open at your sides, palms up, and allow the legs to rest heavy against the wall with a soft, comfortable bend if the hamstrings feel tight.
  4. Slide a cushion or folded towel under your hips if you want a gentle pelvic lift, and let your low back settle flat into the floor.
  5. Close your eyes and breathe slowly through the nose, exhaling a little longer than you inhale, for the full hold.

Dose: 1 hold of 5-15 minutes, nightly as the last step of a wind-down routine

⚠ Skip or clear with your clinician if you have uncontrolled high blood pressure, glaucoma, or are in later pregnancy (lying flat can compress the vena cava). Come down slowly by bending the knees to the chest and rolling to one side to avoid a head-rush or dizziness.

hamstringscalveslower backnervous systemvenous return
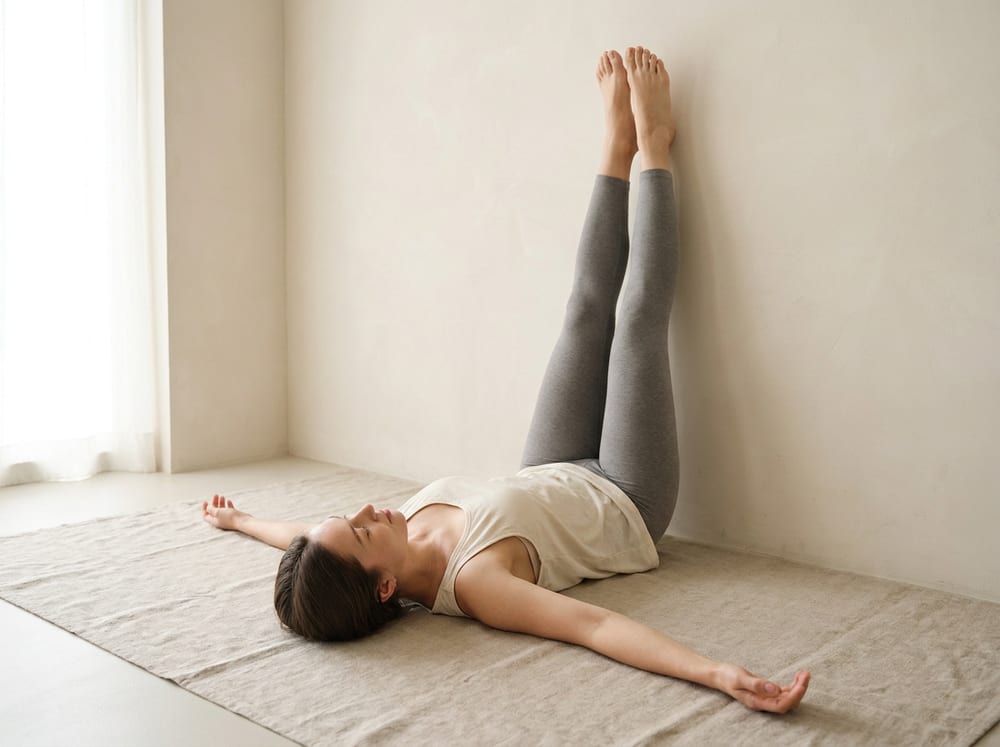
A person lying on their back on a light mat with hips near a plain pale wall and both legs resting straight up against it, wearing neutral gray leggings and a relaxed tank, arms open at the sides with palms up, eyes closed and face serene, calm diffuse natural light filling a tidy minimal room. Flexibility

Legs-Up-the-Wall Pelvic Circulation Reset

beginner
SexualStressSleep

A restorative inversion lying with the hips near a wall and the legs resting vertically up it, using mild gravity drainage and a parasympathetic breathing focus to flush the pelvis and calm the nervous system.

WhyResting the legs up a wall reverses the day's downward pooling of venous blood and lymph in the legs and pelvis: gravity assists venous and lymphatic return from the lower body while fresh arterial blood perfuses the pelvic organs, relieving the vascular congestion that chronic sitting produces in the very tissues responsible for arousal and genital blood flow. Just as importantly, the gentle inversion and the slow, extended-exhale breathing it invites shift the autonomic balance toward the parasympathetic 'rest and arouse' state; sexual arousal is fundamentally a parasympathetic, blood-flow-dependent event that a stressed, sympathetically driven nervous system suppresses. Ten quiet minutes here lowers heart rate, quiets the mind, and primes both the vascular and neural conditions for desire, while the same down-regulation makes it a reliable pre-sleep wind-down.

How to do it
  1. Sit sideways with one hip close to the wall, then lie back and swing your legs up the wall as you turn to face it, so your sit bones rest at or near the baseboard.
  2. Let the legs rest vertically up the wall, knees soft, feet relaxed, arms open at your sides with palms up.
  3. Slide a folded towel or thin cushion under the hips only if it feels comfortable, keeping the low back at ease.
  4. Close your eyes and breathe slowly through the nose, making each exhale a little longer than the inhale.
  5. Stay 5-10 minutes, letting the legs, belly, and pelvic floor go completely heavy and relaxed.
  6. To come out, bend the knees, roll gently to one side, and rest there for a few breaths before sitting up slowly.

Dose: 5-10 minutes, once daily or as an evening wind-down, most days

⚠ Come out slowly to avoid a head rush, and skip this if you experience dizziness, uncontrolled high blood pressure, glaucoma or other eye-pressure conditions, or acute reflux. Avoid lying flat on the back for extended periods after the first trimester of pregnancy; a supported side-lying rest is a safer alternative then.

pelvic circulationvenous and lymphatic returnhamstringslower backautonomic nervous system
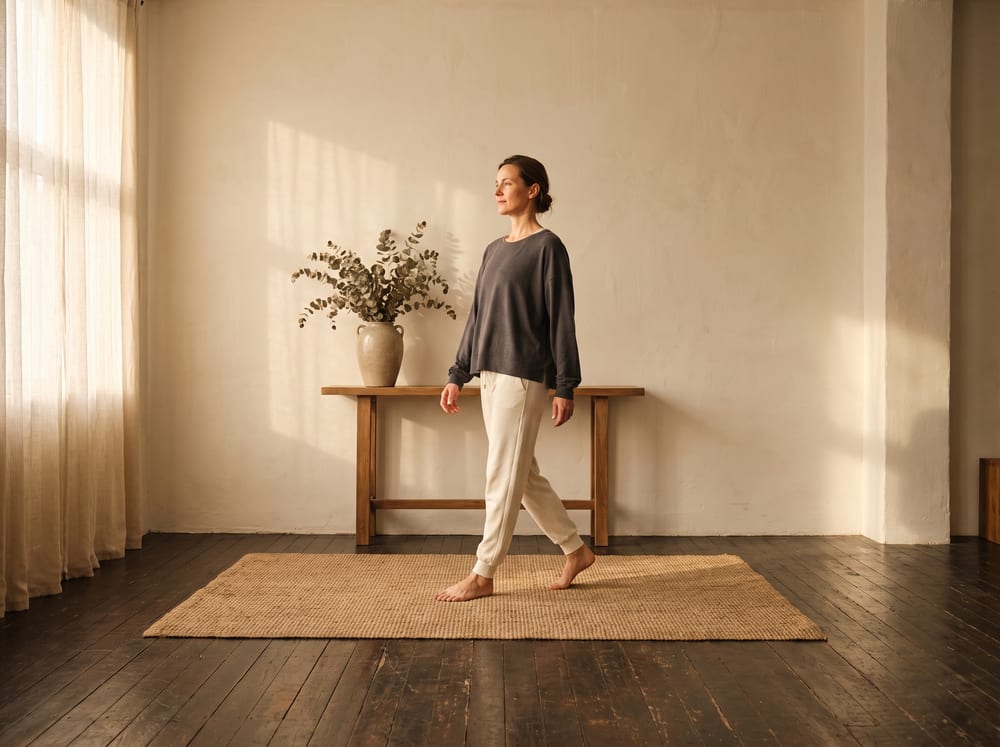
A warm, photorealistic editorial photograph in soft natural light with a warm ivory and espresso palette, 4:3 framing, no text or words anywhere: a healthy adult in their forties standing and walking upright and fully vertical across a bright, calm room on a mat and light wood floor, body tall and unrotated with an easy relaxed posture and a gentle stride, wearing modest neutral athletic wear, soft window light warming the ivory walls. Mobility

Post-Meal Walking Protocol

beginner
DigestiveCardio

A short, unhurried walk begun soon after eating, timed and paced specifically to support gastric emptying and blunt the after-meal glucose rise rather than to build fitness.

WhyLight walking after a meal engages the large muscles of the legs, and contracting muscle draws glucose out of the bloodstream through an insulin-independent pathway, which is why controlled trials fairly consistently show a lower and flatter post-meal blood-sugar curve when people walk soon after eating rather than sitting. The rhythmic movement and gentle abdominal jostling of an easy walk are also thought to encourage the stomach to empty and to support normal intestinal motility, and small studies report modestly faster gastric emptying and less post-meal bloating with a short walk. The evidence is strongest for the glucose effect and more suggestive for the motility and comfort effects, so this is best understood as a low-cost habit with a plausible mechanism rather than a proven treatment for any gut disorder. Keeping the pace conversational matters: the goal is to move blood to working muscle and keep the gut settled, not to divert circulation away from digestion with hard exertion.

How to do it
  1. Within about 15 to 30 minutes of finishing a meal, stand up and begin walking at an easy, conversational pace on level ground, indoors or out.
  2. Let the arms swing naturally and keep the torso tall so the belly has room to move; breathe through the nose in a relaxed rhythm.
  3. Hold the effort where you could still talk in full sentences, roughly a 2 to 3 out of 10 exertion, never pushing into breathlessness.
  4. Continue for 10 to 15 minutes, or as little as 5 if that is what the day allows, then slow to a stop and stand or sit upright.
  5. Avoid vigorous pace, hills, or any bending and twisting during the walk, which can feel uncomfortable on a full stomach.

Dose: One 10-15 minute easy walk after your largest one or two meals, most days of the week

⚠ This is general wellness movement for discussion with your clinician, not treatment for reflux, gastroparesis, or any diagnosed condition. If you have reflux, an easy flat walk is usually well tolerated, but stop and stay upright if you feel worse. Those with cardiovascular disease, blood-sugar-lowering medication, dizziness, or balance concerns should clear a post-meal walking habit with their clinician first and keep the pace gentle. Stop for any chest pain, unusual breathlessness, or lightheadedness.

legshipscorecardiovascular systemgastrointestinal tract
A warm, photorealistic editorial photograph in soft natural light with a warm ivory and espresso palette, 4:3 framing, no text or words anywhere: a healthy adult in their forties standing and walking upright and fully vertical across a bright, calm room on a mat and light wood floor, body tall and unrotated with an easy relaxed posture and a gentle stride, wearing modest neutral athletic wear, soft window light warming the ivory walls. Mobility

Post-Meal Walking Protocol

beginner
DigestiveCardio

A short, unhurried walk begun soon after eating, timed and paced specifically to support gastric emptying and blunt the after-meal glucose rise rather than to build fitness.

WhyLight walking after a meal engages the large muscles of the legs, and contracting muscle draws glucose out of the bloodstream through an insulin-independent pathway, which is why controlled trials fairly consistently show a lower and flatter post-meal blood-sugar curve when people walk soon after eating rather than sitting. The rhythmic movement and gentle abdominal jostling of an easy walk are also thought to encourage the stomach to empty and to support normal intestinal motility, and small studies report modestly faster gastric emptying and less post-meal bloating with a short walk. The evidence is strongest for the glucose effect and more suggestive for the motility and comfort effects, so this is best understood as a low-cost habit with a plausible mechanism rather than a proven treatment for any gut disorder. Keeping the pace conversational matters: the goal is to move blood to working muscle and keep the gut settled, not to divert circulation away from digestion with hard exertion.

How to do it
  1. Within about 15 to 30 minutes of finishing a meal, stand up and begin walking at an easy, conversational pace on level ground, indoors or out.
  2. Let the arms swing naturally and keep the torso tall so the belly has room to move; breathe through the nose in a relaxed rhythm.
  3. Hold the effort where you could still talk in full sentences, roughly a 2 to 3 out of 10 exertion, never pushing into breathlessness.
  4. Continue for 10 to 15 minutes, or as little as 5 if that is what the day allows, then slow to a stop and stand or sit upright.
  5. Avoid vigorous pace, hills, or any bending and twisting during the walk, which can feel uncomfortable on a full stomach.

Dose: One 10-15 minute easy walk after your largest one or two meals, most days of the week

⚠ This is general wellness movement for discussion with your clinician, not treatment for reflux, gastroparesis, or any diagnosed condition. If you have reflux, an easy flat walk is usually well tolerated, but stop and stay upright if you feel worse. Those with cardiovascular disease, blood-sugar-lowering medication, dizziness, or balance concerns should clear a post-meal walking habit with their clinician first and keep the pace gentle. Stop for any chest pain, unusual breathlessness, or lightheadedness.

legshipscorecardiovascular systemgastrointestinal tract
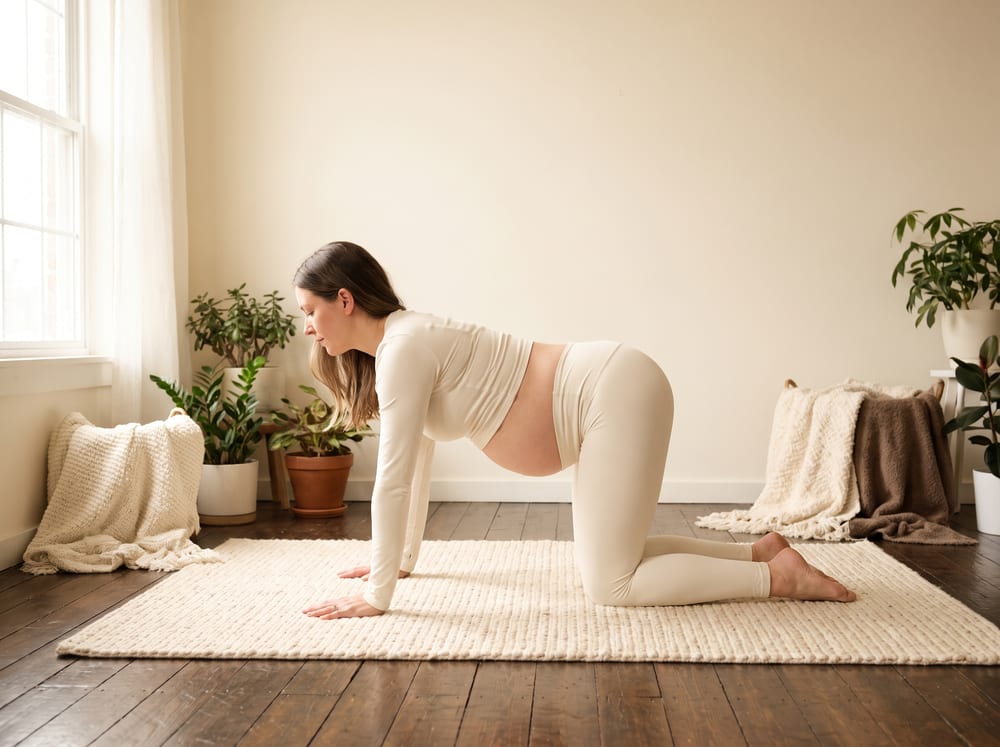
A warm, photorealistic editorial photograph in 4:3 framing of a pregnant woman in her early thirties on all fours on a soft mat in a bright, calm room, her wrists under her shoulders and knees under her hips, her spine held in a level, neutral line and her belly hanging gently away from her spine. She wears modest neutral warm-ivory athletic wear, the torso oriented naturally and not rotated, soft natural light across a warm ivory and espresso palette, no text and no words. Mobility

Prenatal Cat-Cow on All Fours

beginner
PregnancyStress

A gentle, hands-and-knees spinal mobility flow that eases the low-back tension of a shifting center of gravity and lets the belly hang away from the spine, a position many pregnant people find relieving.

WhyAs pregnancy advances, the growing uterus shifts the center of gravity forward and the lumbar curve tends to deepen, loading the low back and the muscles along the spine. Moving slowly between a rounded spine (cat) and a gently extended, neutral spine (cow) on all fours takes the lumbar spine through a comfortable, unloaded range and rhythmically contracts and relaxes the surrounding muscles, which can reduce stiffness and provide short-term relief of pregnancy-related low-back and pelvic-girdle discomfort. The evidence here is honest but modest: exercise programs that include cat-cow-style mobility are associated with reduced low-back pain in pregnancy, though cat-cow is rarely studied in isolation, so treat it as a low-risk comfort measure rather than a proven treatment. The all-fours position is also valued because it lets the abdomen hang down and away from the spine, avoiding the deep abdominal compression of a crunch and keeping the person off their back. Some find the position helpful for general comfort in late pregnancy, though claims about influencing the baby's position are not well supported.

How to do it
  1. Come onto all fours on a padded mat with your wrists stacked under your shoulders and your knees under your hips, spine long and neutral, gaze down so your neck stays in line with your spine.
  2. Exhale and gently round your spine toward the ceiling into the cat shape, letting your head and tailbone drop softly and drawing the belly up only lightly, without any forced abdominal squeeze.
  3. Inhale and slowly return through neutral, letting the spine lengthen into a gentle, comfortable cow shape. Stop at a flat, relaxed back rather than sagging deeply into the low back, which can feel pinchy in pregnancy.
  4. Continue moving slowly between the two shapes, matching the pace to your breath and keeping the range within what feels easy and relieving.
  5. Finish in a neutral spine, then lower to sit back gently toward your heels or rise carefully to standing, avoiding any twisting of the trunk.

Dose: 1-2 sets of 8-10 slow cat-cow cycles, most days

⚠ Educational content for discussion with your clinician, not medical advice. Get provider clearance before starting, particularly with wrist pain (carpal tunnel is common in pregnancy), pelvic-girdle pain, or any complication. Keep the movement small and comfortable and never force spinal extension; avoid deep abdominal compression and any twisting. Do not hold your breath. Trimester modifications: first trimester, the standard all-fours version is generally comfortable. Second and third trimesters, reduce the range so you move only between a rounded and a flat, neutral spine rather than dropping deeply into the low back, cushion the knees, and shorten the session if wrists complain; an elevated version with hands on a sturdy chair seat or countertop while standing and hinging at the hips is a good substitute if kneeling is uncomfortable. Stop and consult your provider for any vaginal bleeding, fluid leakage, dizziness, or contractions.

lumbar spinethoracic spinespinal erectorships
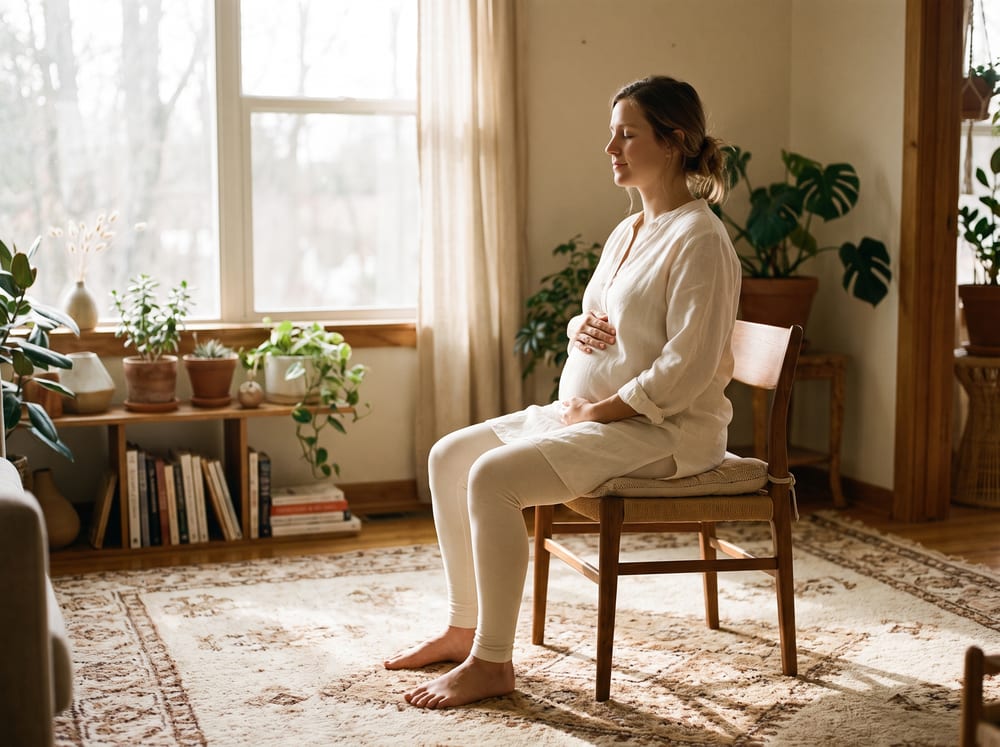
A warm, photorealistic editorial photograph in 4:3 framing of a pregnant woman in her early thirties seated upright and vertical on a firm chair on a soft mat in a bright, calm room, her spine tall and shoulders relaxed as she practices a quiet seated pelvic-floor engagement. She wears modest neutral athletic wear in warm ivory tones, the figure clearly upright and not rotated, soft natural light falling across a warm ivory and espresso palette, no text and no words. Strength

Prenatal Pelvic-Floor (Kegel) Training

beginner
PregnancyStrength

A low-load, no-equipment drill that trains the pelvic-floor muscles to both contract and, just as importantly, fully release, building the coordination the body draws on through pregnancy, birth, and recovery.

WhyThe pelvic floor is a sling of muscle that supports the growing uterus, bladder, and bowel and resists the steadily rising downward load of pregnancy. Training it is one of the few prenatal interventions with reasonably strong supporting evidence: supervised pelvic-floor muscle training during pregnancy is associated with a lower likelihood of urinary incontinence in late pregnancy and the early postpartum period, and Cochrane reviews rate this benefit as moderate-certainty for first-time mothers who train antenatally. The mechanism is straightforward strength and motor control, thickening and improving the timing of the levator ani group so it can support load and close the urethra under the pressure of a cough, sneeze, or laugh. Learning to fully relax the muscle matters as much as the squeeze, because a floor that cannot let go can contribute to pelvic pain and may complicate the pushing stage. Evidence for a shorter or easier labor is weaker and mixed, so this drill is framed around continence and body awareness, not birth outcomes.

How to do it
  1. Sit tall on a firm chair or stand upright, or in later pregnancy sit on a birth ball, with your spine long and shoulders relaxed. Avoid lying flat on your back for this drill after the first trimester.
  2. Exhale gently and draw the muscles around the vagina and anus up and inward, as if stopping the flow of urine and holding back gas at the same time, without clenching your buttocks, thighs, or holding your breath.
  3. Hold the lift for 3 to 5 seconds while breathing normally, then consciously and fully let the muscles go, letting them lengthen and relax completely. The full release is the part most people skip.
  4. Repeat for a set of slow, long holds, keeping the belly, jaw, and breath soft throughout.
  5. Then perform a set of quick flicks: a fast lift-and-full-release once per second, training the rapid response the floor uses during a cough or sneeze.

Dose: 10 long holds (3-5 seconds each with full release) plus 10 quick flicks, 2-3 rounds per day

⚠ Educational content for discussion with your clinician, not medical advice. Get clearance from your OB provider, midwife, or a pelvic-floor physical therapist before starting, especially if you have pelvic pain, a history of pelvic-floor dysfunction, or any pregnancy complication. Never hold your breath or bear down. If you feel pain, cannot tell whether you are contracting correctly, or notice you can lift but not fully release, ask for a referral to a pelvic-floor physical therapist for hands-on assessment. Trimester modifications: first trimester, this can be done sitting, standing, or side-lying. Second and third trimesters, avoid lying flat on your back; sit upright, stand, or use a birth ball, and focus increasingly on the release phase as the floor bears more load. Postpartum, resume only once cleared, typically starting gently and progressing under guidance.

pelvic floorlevator anideep core
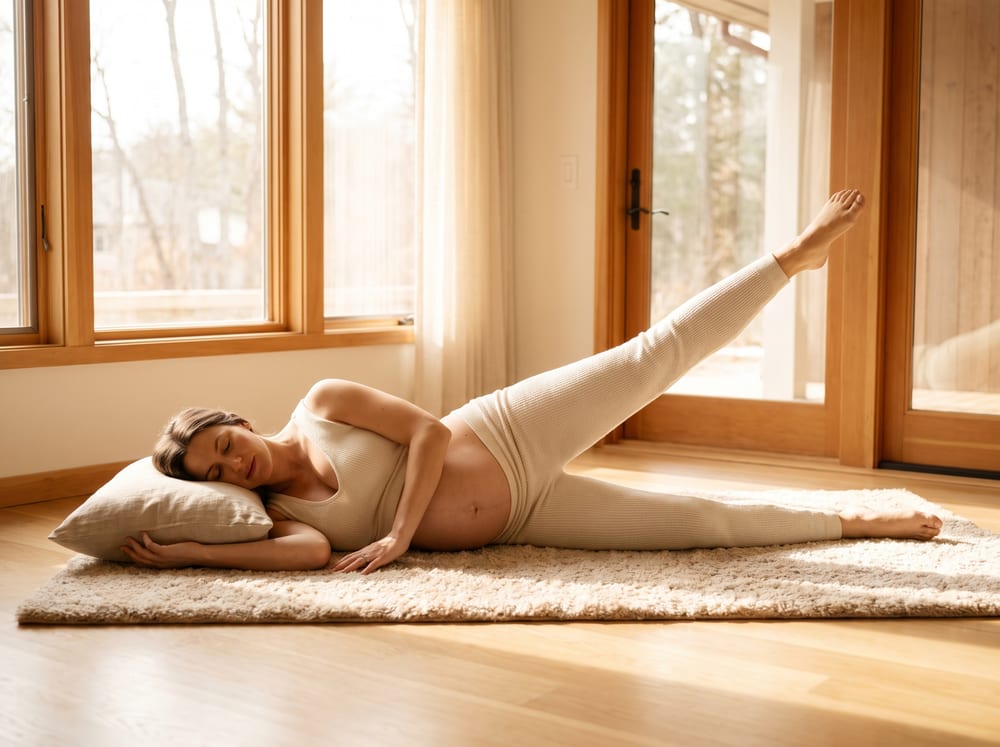
A warm, photorealistic editorial photograph in 4:3 framing of a pregnant woman in her early thirties lying on her side on a soft mat in a bright, calm room, her head resting on a pillow with hips and shoulders neatly stacked and her long spine level, lifting her top leg smoothly toward the ceiling in a controlled hip-abduction movement. She wears modest neutral warm-ivory athletic wear, the body in a clean level side-lying line and not rotated forward or back, soft natural light across a warm ivory and espresso palette, no text and no words. Strength

Prenatal Side-Lying Leg Lifts

beginner
PregnancyStrength

A side-lying hip drill that strengthens the outer-hip and glute muscles which stabilize the pelvis, done in a position that keeps the weight of the uterus off the major blood vessels and away from the back.

WhyThe gluteus medius and other outer-hip muscles are the primary stabilizers of the pelvis during single-leg moments like walking and climbing stairs. In pregnancy the widening pelvis, ligament laxity, and altered gait increase the demand on these muscles, and weakness there is linked to hip and pelvic-girdle discomfort. Side-lying leg lifts load exactly this group with body weight alone, in a controlled, low-fall-risk position. The side-lying posture itself is a deliberate choice: from the second trimester onward, lying flat on the back can let the heavy uterus compress the inferior vena cava and reduce blood return to the heart, so this drill keeps the person on their side, which is the recommended resting position in later pregnancy and avoids any deep abdominal compression. The evidence is modest and mechanistic rather than from large prenatal trials, so this is presented as a sensible, low-risk way to maintain hip stability, not a proven treatment for pain.

How to do it
  1. Lie on your side on a padded mat with a pillow supporting your head so your neck stays in line with your spine, hips and shoulders stacked, and knees slightly bent for a stable base.
  2. Rest your bottom arm under the pillow and place your top hand on the floor in front of your chest for light steadiness. Keep your torso long and your top hip pointing forward, not rolled back.
  3. Straighten the top leg in line with your body, then exhale and lift it slowly toward the ceiling to a comfortable height, leading with the heel and keeping the toes pointing forward rather than turning up.
  4. Lower the leg slowly and with control, stopping just before it rests, keeping tension in the outer hip throughout.
  5. Complete the set, then roll carefully to the other side and repeat with the other leg. For a gentler version, keep the bottom knee bent and lift a bent top leg (clamshell) instead.

Dose: 2 sets of 10-15 slow lifts per side, 2-3 days per week

⚠ Educational content for discussion with your clinician, not medical advice. Get provider clearance before starting, and stop if you have pelvic-girdle or pubic-symphysis pain, which hip abduction can aggravate; a smaller range or the bent-knee clamshell version is gentler. Keep the movement slow and controlled, never hold your breath, and get up from the floor slowly to avoid a blood-pressure drop and dizziness. Trimester modifications: first trimester, the straight-leg version is generally comfortable. Second and third trimesters, stay side-lying rather than rolling onto your back, add a pillow between the knees for comfort, reduce the lift height if the outer hip or round-ligament area complains, and favor the clamshell variation as the belly grows. Stop and consult your provider for bleeding, fluid leakage, contractions, dizziness, or calf pain and swelling.

gluteus mediusouter hiphip abductorspelvic stabilizers
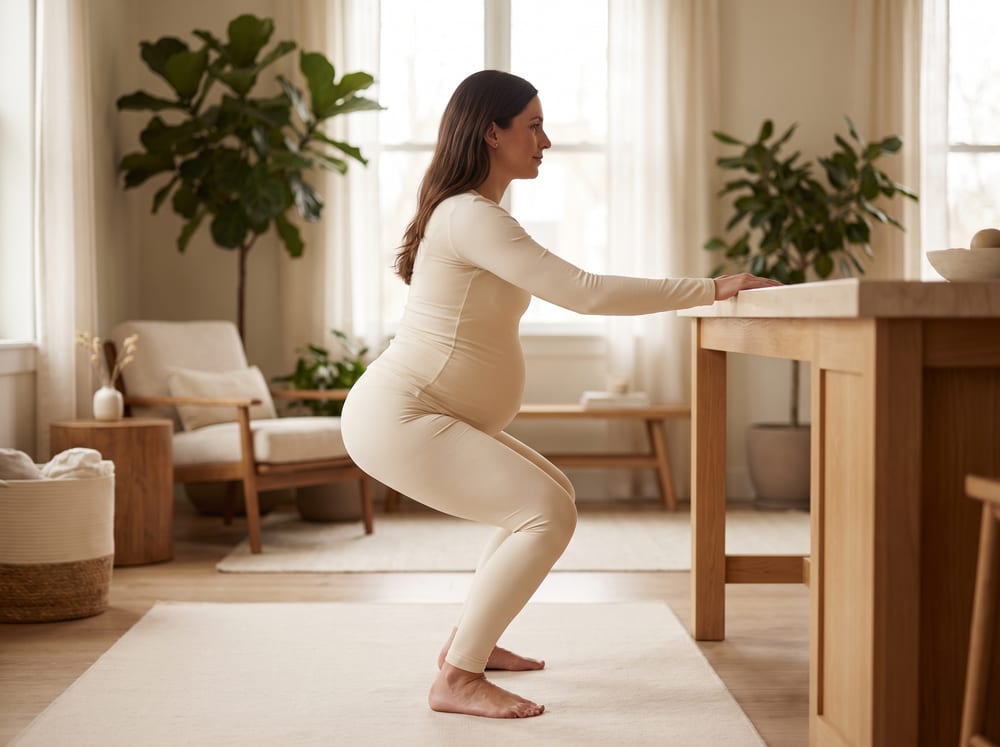
A warm, photorealistic editorial photograph in 4:3 framing of a pregnant woman in her early thirties standing upright and vertical on a soft mat in a bright, calm room, facing a sturdy light-wood countertop with both hands resting lightly on it for support as she lowers into a shallow, controlled squat with a tall chest and level hips. She wears modest neutral warm-ivory athletic wear, the figure clearly upright and not rotated, soft natural light across a warm ivory and espresso palette, no text and no words. Strength

Prenatal Supported Squat

beginner
PregnancyStrength

A shallow, chair- or counter-supported squat that keeps the lower body strong for the daily demands of pregnancy and early parenthood, with the support removing the balance and fall risk of an unassisted squat.

WhySquatting trains the large muscles that carry a pregnant body through daily life: the quadriceps, glutes, and hamstrings that stand you up from a chair, lift a laundry basket, and, later, repeatedly rise while holding a newborn. Maintaining lower-body strength through pregnancy is supported by broad guidance from ACOG and obstetric bodies recommending continued resistance and functional exercise in an uncomplicated pregnancy, on the reasoning that preserved strength supports posture, mobility, and postpartum recovery. Holding a countertop, sturdy chair, or door frame is the key modification: pregnancy relaxes ligaments (partly via the hormone relaxin) and moves the center of gravity forward, which degrades balance, so external support removes fall risk while still letting the legs do the work. Keeping the squat shallow and controlled also avoids the deep end-range positions that can aggravate pelvic-girdle pain. Evidence that squatting eases labor or delivery is limited and inconsistent, so this drill is offered for strength and function, not as a birth-preparation claim.

How to do it
  1. Stand upright facing a sturdy countertop or the back of a heavy chair, feet a little wider than hip-width, toes turned slightly out, and rest your hands lightly on the support.
  2. Keeping your chest lifted and spine tall, hinge back at the hips as if reaching your seat toward a chair behind you, letting your knees bend and track over your toes.
  3. Lower only to a comfortable, controlled depth, keeping your heels down and using the support for balance rather than pulling yourself down with your arms. Do not force depth.
  4. Exhale and press evenly through your feet to stand back up, gently engaging the glutes without holding your breath.
  5. Pause tall at the top, resetting your posture, then repeat at a slow, controlled tempo.

Dose: 2-3 sets of 8-12 controlled squats, 2-3 days per week on non-consecutive days

⚠ Educational content for discussion with your clinician, not medical advice. Get provider clearance before starting resistance work in pregnancy, and stop if you have pelvic-girdle or pubic-symphysis pain, which squatting can aggravate. Always use support, keep the depth shallow and controlled, and never hold your breath or bear down, since straining raises intra-abdominal and pelvic-floor pressure; exhale on the effort. Avoid unsupported or jumping squats entirely because of fall risk. Trimester modifications: first trimester, a moderate supported squat is generally fine. Second and third trimesters, widen the stance, reduce the depth, and rely more on the support as balance and the center of gravity shift; if standing up from low positions provokes dizziness, rise slowly. Stop and consult your provider for bleeding, fluid leakage, contractions, calf pain or swelling, chest pain, or dizziness.

quadricepsgluteshamstringships
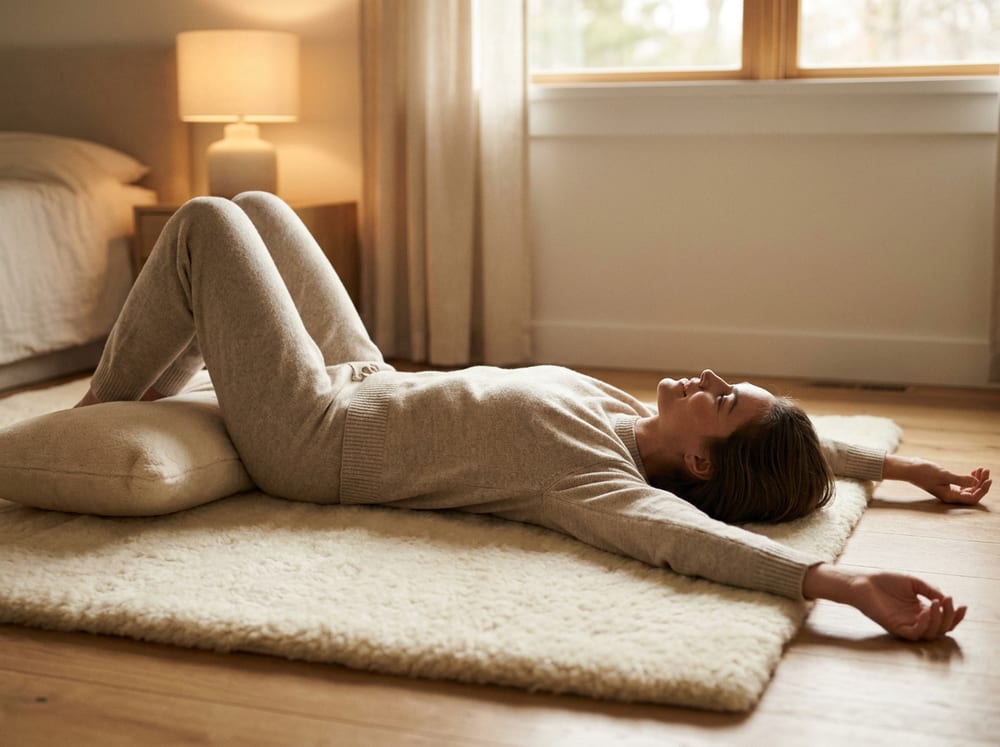
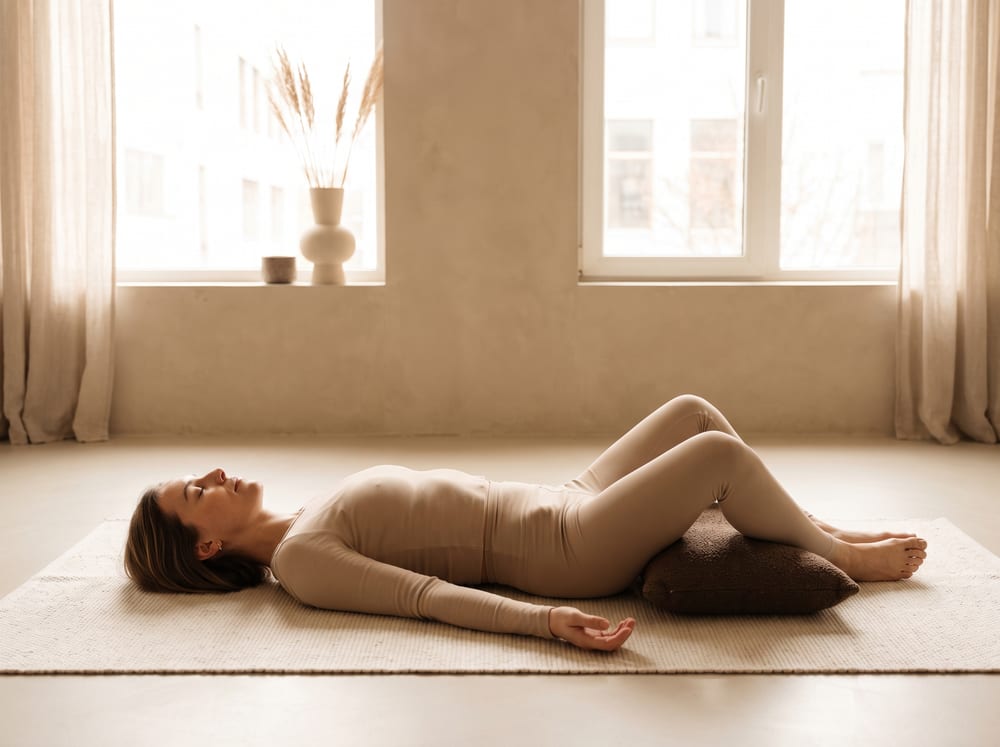
A person lying on their back on a warm-toned mat in a peaceful, low-lit bedroom, soles of the feet pressed together and knees dropped open with a small rolled towel supporting each outer thigh, one hand resting on the belly, wearing neutral sand-colored athletic wear, eyes closed and face calm, soft golden light from a corner lamp. Flexibility

Reclined Bound-Angle (Reclined Butterfly)

beginner
SleepStressSexual

A restful supported reclined posture with the soles of the feet together and knees dropped open, letting gravity release the inner thighs and hips while the chest opens for easy breathing.

WhyBringing the soles together and letting the knees fall wide passively lengthens the adductors (inner-thigh muscles) and opens the hip and pelvic-floor region, areas that stay chronically shortened from sitting and that carry a surprising amount of held tension. Because the position is fully supported and the legs are not working, the stretch is low-intensity and non-threatening to the nervous system, so instead of triggering a protective guarding response it invites the muscles to release over minutes. Reclining also lets the ribcage and diaphragm expand freely, so breathing slows and deepens, cueing parasympathetic dominance. Releasing pelvic and inner-hip tension both improves comfort in side-lying and back-lying sleep positions and supports healthy pelvic circulation, making this a genuinely relaxing pre-sleep posture.

How to do it
  1. Lie on your back and bring the soles of your feet together, letting your knees fall open toward the floor into a diamond shape.
  2. Slide the heels a comfortable distance from your body; closer to the hips gives a deeper stretch, farther away is gentler.
  3. Place a cushion or rolled towel under each outer thigh so the hips can fully relax rather than hang.
  4. Rest your arms softly at your sides or one hand on the belly and one on the chest, and let the low back stay neutral.
  5. Close your eyes and breathe slowly into the belly and lower ribs for the full hold, letting the knees sink a little more with each exhale.

Dose: 1 supported hold of 3-8 minutes, nightly as part of a wind-down

⚠ Always support the outer thighs with cushions to avoid overstretching the groin, especially in pregnancy or with any hip or pubic-symphysis pain. Come out slowly by using your hands to bring the knees back together. Move to a side-lying position if lying flat is uncomfortable late in pregnancy.

inner thighsadductorshipspelvic floorchest
A warm, photorealistic editorial photograph in a bright calm room with a soft ivory and espresso palette, soft natural window light, 4:3 framing, no text or words anywhere. A woman in her early thirties in modest neutral athletic wear reclines on a plain exercise mat in a supported bound-angle position with the soles of her feet together and cushions under each knee, her body lying flat and squarely aligned rather than rotated, her expression calm and her breathing relaxed. Flexibility

Reclined Bound-Angle to Gentle Twist Flow

beginner
FertilityStressMenstrual

A calm, floor-based yoga sequence moving between a supported reclined bound-angle position and a gentle supine spinal twist, opening the hips and easing the low back while cueing slow breathing to settle the nervous system.

WhyGentle yoga sits at the intersection of two fertility-relevant pathways: circulation and stress physiology. Opening the hips and moving the lumbar spine and pelvis encourages blood flow through the pelvic region, and unhurried, breath-led movement activates the parasympathetic branch of the nervous system, lowering the chronic stress signaling that can dampen the reproductive axis. The evidence that psychological stress meaningfully lowers fertility is mixed and hotly debated, so the honest framing is that this practice reliably reduces perceived stress and improves relaxation, with a plausible but unproven downstream benefit for conception. Where the evidence is stronger is quality of life and distress during fertility treatment, where mind-body and yoga programs consistently help people cope. Men benefit from the same relaxation and pelvic-mobility effects. This is a restorative, low-intensity counterweight to strength and walking days, not a workout, and it is safe to do often.

How to do it
  1. Sit on the mat, then lie back with your spine long, and bring the soles of your feet together so your knees fall gently open into a diamond shape.
  2. Slide a cushion under each knee so the inner thighs can release without strain, rest your arms at your sides, and breathe slowly for several full breaths.
  3. To transition, draw your knees back together, then hug both knees toward your chest for a moment to reset the low back.
  4. Let both knees lower slowly to one side into a gentle supine twist, keeping both shoulders resting on the mat and turning your gaze the opposite way if it is comfortable.
  5. Breathe softly into the stretch for several slow breaths, feeling the low back and outer hip lengthen without forcing the knees down.
  6. Bring the knees back to center, repeat the twist to the other side, then return to the supported bound-angle position to finish.

Dose: Hold each position for 5-10 slow breaths (about 1-2 minutes), flowing through the full sequence 2-3 times, most days of the week

⚠ This is educational information for discussion with your clinician, not medical or fertility advice. Move only into a mild, comfortable stretch and never force the knees toward the floor, which can strain the inner thigh or knee. If you are pregnant, later-pregnancy positions flat on your back may be uncomfortable or discouraged, so confirm suitable positioning with your care team. Skip or modify the twist if you have significant low-back, hip, or SI-joint issues.

inner thighship adductorship flexorslumbar spinepelvic floor
A woman in her thirties in simple black leggings and a fitted long-sleeve top lies on her back on a light rug in gentle daylight, both bent knees dropped softly to one side onto a small cushion, arms open wide on the floor with palms up, head turned the opposite way, shoulders relaxed and grounded. Mobility

Reclined Spinal Twist

beginner
StressSleep

A gentle rotation done lying on the back, dropping bent knees to one side while the shoulders stay grounded and the gaze turns the opposite way.

WhyRotating the spine while fully supported on the floor gently mobilizes the thoracic and lumbar facet joints and lengthens the obliques, quadratus lumborum, and deep spinal rotators that stiffen and grip during long sitting and stress. Because gravity does the work and the body is lying down, the muscles can release rather than brace, which lets the twist decompress the spine and ease low-back tension without effort. The slow, breath-paced quality is the calming ingredient: a long relaxed exhale into the twist lengthens expiration relative to inhalation, and that longer exhale raises vagal tone and nudges the nervous system toward its parasympathetic rest state, lowering heart rate and physical tension. Doing it symmetrically on both sides in bed or on the floor makes it an effective tension-release transition into sleep.

How to do it
  1. Lie on your back with knees bent and feet on the floor, arms open in a low T with palms up.
  2. Exhale and let both knees drop slowly to the right, keeping them stacked and stopping wherever your left shoulder wants to lift.
  3. Turn your head gently to the left and keep both shoulder blades reaching toward the floor.
  4. Let gravity settle the knees; do not push, and rest a cushion under the top knee if it hangs in the air.
  5. Breathe slowly for the hold, then draw the knees back to center on an inhale and repeat to the other side.

Dose: Hold 6 to 8 slow breaths per side, 1 to 2 rounds each side

⚠ Move into and out of the twist slowly and keep the range gentle; the goal is release, not maximum rotation. Keep the twist small and supported with a cushion under the knees if you have low-back pain, and avoid deep rotation with an acute disc injury or after recent abdominal or spinal surgery. In later pregnancy keep any time on the back brief and favor an open, shallow twist.

thoracic spinelumbar spineobliquesquadratus lumborumchest
A person lying on their back on a soft cream mat in a softly lit bedroom, both bent knees dropped gently to one side with a pillow between them while both shoulders and outstretched arms stay flat on the floor, head turned the opposite way with a relaxed expression, wearing neutral oatmeal-colored loungewear, gentle warm light from a bedside lamp. Flexibility

Reclined Supine Spinal Twist

beginner
SleepStress

A slow, gravity-assisted lying twist that drops both bent knees to one side while the shoulders stay grounded, gently decompressing the spine and quieting the body before sleep.

WhyLetting the knees fall to one side rotates the lumbar and lower thoracic spine, lengthening the quadratus lumborum, the oblique abdominals, and the deep multifidus and glute fibers that clench through a day of sitting and standing. This gentle rotation eases the paraspinal muscles that guard around the spine, relieving the low-grade back tension that makes it hard to find a comfortable sleeping position. Done slowly with long exhales, the twist also lengthens the front of the ribcage on the top side, which opens the diaphragm's range and encourages the slow, full breathing that activates the vagus nerve and parasympathetic tone. The result is a body that is both mechanically comfortable and neurologically calmer, so it can let go into sleep.

How to do it
  1. Lie on your back with your knees bent and feet flat, then draw both knees up toward your chest.
  2. Stretch both arms out to the sides in a T, palms down, to anchor your shoulders.
  3. On a slow exhale, let both knees drop gently to the right, keeping them stacked and stopping wherever you feel a mild, comfortable stretch.
  4. Keep both shoulder blades in contact with the floor, turning your gaze softly to the left if it feels good on the neck.
  5. Breathe slowly for several rounds, then float the knees back to center on an inhale and repeat to the other side.

Dose: 1-2 slow holds of 5-8 breaths per side, nightly before bed

⚠ Keep the movement small and passive if you have a disc issue or sciatica, and never force the knees down. Place a pillow under the top knee if it pulls on the low back. Ease out of the twist if you feel any pinching in the spine.

lower backobliquesquadratus lumborumglutesthoracic spine
A warm, photorealistic editorial photograph in soft natural light with a warm ivory and espresso palette, 4:3 framing, no text or words anywhere: a woman in her early thirties in modest neutral sand-colored leggings and a fitted ecru top lying on her back on a mat in a bright calm room, knees bent with the soles of the feet together and knees dropped gently open, each knee resting on a small cushion; she is squarely on her back with the torso vertical and aligned to the mat and not tilted or rotated in frame, arms open at the sides with palms up, eyes closed and face calm. Mobility

Reclined Supported Hip-Opener Windshield Wipers

beginner
MenstrualStress

A supine, low-effort hip-opening drill: lying on the back with knees bent and feet wide, the knees sway slowly side to side like windshield wipers, optionally pausing with the knees dropped open over a cushion to release the hips and inner thighs during a period.

WhyLying on the back removes any load from the spine and pelvis, so the hips can move freely with almost no muscular effort. Swaying the knees rotates the hip joints through an easy internal-and-external arc and gently mobilizes the sacroiliac region, while pausing with the knees dropped open lets the inner-thigh adductors and outer hips release, areas that tighten and guard when cramps flare. This is comfort-oriented: the value is reduced hip and low-back tension and a calming, rhythmic movement done from a fully rested position, not any direct action on the uterus. The supported, supine setup also frees the ribcage and diaphragm to breathe slowly, nudging the nervous system toward its parasympathetic state. Evidence that gentle movement eases menstrual discomfort is real but limited and low-certainty, so this belongs in the category of safe, soothing self-care rather than treatment, and the fully supported version keeps intensity minimal on hard days.

How to do it
  1. Lie on your back with your knees bent and feet on the floor a little wider than your hips, arms resting open at your sides.
  2. Keeping the movement slow and effortless, let both knees sway gently to one side, only as far as stays completely comfortable, then float them back through center to the other side.
  3. Continue the slow side-to-side wipers in rhythm with your breath, keeping the shoulders and belly relaxed and the low back at ease.
  4. To open the hips instead, bring the soles of the feet together and let the knees drop wide, resting each knee against a cushion so the inner thighs release without effort.
  5. Breathe slowly and low into the belly and let the hips grow heavier with each exhale, staying two to five minutes in whichever variation feels best.
  6. To finish, bring the knees back together with your hands, hug them softly toward the chest for a breath or two, then roll to one side and rest before sitting up.

Dose: 8 to 12 slow wipers each side, or a 2 to 5 minute supported knees-open hold, as needed during the period

⚠ This is educational content for discussion with a clinician, not medical advice or a prescription. Always rest the knees on cushions when dropping them open to avoid overstretching the inner thighs or groin, and take the sway only as far as is fully comfortable, especially with any hip or pubic-symphysis pain. Come out slowly using your hands. If you are past the first trimester of pregnancy, favor a side-lying rest over long periods flat on the back. Seek medical care for period pain that is severe, worsening, new, or accompanied by fever, heavy bleeding, faintness, or pain outside your normal pattern.

hipsinner thighsadductorssacroiliac regionlow back
A man in his forties in a plain grey t-shirt sits upright on a simple wooden chair near a window in soft natural light, tilting his head gently toward one shoulder with the opposite shoulder relaxed and dropped, one hand resting lightly on the side of his head, expression calm and posture tall. Flexibility

Seated Neck and Shoulder Release

beginner
Stress

A slow seated sequence of shoulder rolls and side-bending neck stretches that unwinds the upper-trapezius and neck tension where stress most visibly collects.

WhyThe upper trapezius and levator scapulae are among the first muscles to tense under psychological stress; the shoulders creep up toward the ears and stay chronically elevated, producing the tight neck, headaches, and hunched posture people describe as carrying stress in their shoulders. Slow shoulder rolls actively contract then fully release these muscles, and the deliberate downward release teaches the nervous system to let them drop from their guarded resting length. The gentle lateral neck stretch then lengthens the upper trapezius and levator scapulae and eases pressure on the cervical facet joints and the tissue around the nerves that exit the neck. Combined with slow breathing, consciously dropping the shoulders provides direct proprioceptive feedback that the body is safe to relax, interrupting the stress-tension loop, which is why targeted neck-and-shoulder release so reliably reduces the felt sense of stress.

How to do it
  1. Sit tall in a chair with both feet flat on the floor and hands resting in your lap.
  2. Roll your shoulders slowly up toward your ears, back, and down 5 times, then reverse the direction 5 times.
  3. Let both shoulders settle fully down and away from your ears, then gently drop your right ear toward your right shoulder until you feel a mild stretch along the left side of your neck.
  4. For a little more, rest your right hand lightly on the left side of your head, adding only the weight of the hand, and breathe slowly.
  5. Hold, then float the head back to center on an inhale and repeat to the other side.

Dose: 1 to 2 rounds of shoulder rolls plus a 4 to 6 breath neck hold per side, several times a day as needed

⚠ Keep all movements slow and stay within a pain-free range; never pull the head forcefully or crank the neck. Use only light hand weight for the stretch, not a hard pull. Ease off and check with a clinician if you have cervical radiculopathy, recent neck injury, vertigo, or if any position produces tingling, numbness, or dizziness.

upper trapeziuslevator scapulaecervical spineshouldersneck
A middle-aged woman in neutral gray athletic wear sits upright on a plain wooden dining chair in a bright naturally lit living room, arms crossed over her chest, calmly rotating her head and upper torso to one side while her hips and knees stay squarely facing forward, spine long and shoulders relaxed. Mobility

Seated Thoracic Rotation (Chair Twist)

beginner
LongevityStress

A gentle seated rotation of the mid-back that restores the ability to twist through the ribcage, using a sturdy chair for support and feedback.

WhyThis targets the thoracic spine, the 12 mid-back vertebrae that supply most of the rotation in your torso. With age and desk sitting, the thoracic facet joints stiffen and the paraspinal and intercostal soft tissues shorten, which forces the neck and lumbar spine to over-rotate and become common pain sites. Actively rotating under control lubricates the facet joints with synovial fluid, lengthens the rotators and obliques, and preserves the trunk rotation you need to check a blind spot while driving, reach behind you, and swing to hand off an object. Better thoracic rotation also frees the ribcage to expand, supporting deeper breathing.

How to do it
  1. Sit tall on a sturdy chair, feet flat and hip-width apart, knees pointing forward.
  2. Cross your arms over your chest or rest fingertips on opposite shoulders to keep the movement in your torso.
  3. Exhale slowly and rotate your head, shoulders, and ribcage to the right, keeping your hips and knees square to the front.
  4. Go only to a gentle end-range stretch, hold 2 to 3 seconds, then return to center on an inhale.
  5. Repeat to the left, moving smoothly and never forcing the twist.

Dose: 2 sets of 8 rotations per side, daily or at least 5 days per week

⚠ Keep hips and knees facing forward so the twist comes from the mid-back, not the lower back. Move slowly and stop short of any sharp pain. If you have osteoporosis or a known spinal condition, keep the range small and check with your clinician first.

thoracic spineobliquesintercostalsrib cage
A lean man in gray shorts and a plain white t-shirt balances on his left leg in a bright, airy room, right foot extended forward to tap the floor, standing knee softly bent and tracking straight, hips level, natural sunlight casting soft shadows on the wood floor. Balance

Single-Leg Clock Reach

intermediate
LongevityCognitiveStrength

Balancing on one leg while reaching the free foot out to points of an imaginary clock face on the floor, driving controlled weight shift and hip control at the edges of stability.

WhyReaching the free leg to different clock positions forces the standing leg to control balance dynamically as your center of mass moves toward the limits of your base of support. The forward and diagonal reaches load the gluteus medius and maximus eccentrically and demand a hip-hinge control strategy, while the standing ankle continuously modulates to keep you over your foot. This mirrors the Star Excursion pattern used in rehab to restore dynamic stability and to close side-to-side deficits. For aging function it rebuilds the confidence and control to reach for a dropped object, load a low shelf, or recover a long stride without toppling, and it strengthens the exact tissues that fail in a lateral or backward loss of balance.

How to do it
  1. Imagine you are standing at the center of a clock face on the floor, twelve in front and six behind.
  2. Balance on one leg with a soft knee, keeping the standing hip level and knee tracking over the foot.
  3. Reach the free foot forward to tap twelve o'clock lightly, then return to center under control.
  4. Reach next toward three and six o'clock (or nine, for the opposite leg), hinging at the hip and keeping the standing kneecap forward.
  5. Complete the reaches, switch legs, and keep the movement slow rather than throwing the leg out.

Dose: 2-3 sets of 6-8 reaches per direction per leg, 3 days per week; widen the reach as control improves

⚠ Only reach as far as you can return without lurching. Keep a chair within a fingertip's reach at first, and avoid letting the standing knee cave inward toward the midline.

gluteus mediusgluteus maximusquadricepsankle stabilizerscore
A man in his fifties wearing plain navy shorts and a fitted t-shirt balances on his right leg in a sunlit living room, left foot lifted a few inches off the pale wood floor, fingertips resting lightly on the back of a wooden dining chair, torso upright and pelvis level. Balance

Single-Leg Stand at the Counter

beginner
LongevityCognitive

Standing on one leg while lightly touching a counter, progressing toward hands-off, to build the single-limb stability used in every step of walking and stair climbing.

WhyRoughly 40 percent of the walking cycle is spent balanced on one leg, so single-leg stance is the most functionally relevant balance skill there is. Holding it recruits the gluteus medius on the standing side to keep the pelvis level, plus the deep ankle invertors and evertors that resist rolling. It also trains the hip and ankle proprioceptors and the rapid feedback loop between them. Age-related decline in single-leg stance time is one of the strongest predictors of fall risk and even mortality, because it reflects the combined health of muscle, nerve, and inner-ear systems. Reclaiming it directly protects gait, stair descent, and the ability to recover when one foot lands unevenly.

How to do it
  1. Stand tall behind a sturdy counter or chair and rest your fingertips lightly on it.
  2. Shift your weight fully onto one foot and lift the other foot a few inches off the floor, knee softly bent.
  3. Keep your standing hip level and your kneecap pointing straight ahead, avoiding a collapse inward.
  4. Once steady, reduce to a single fingertip, then hover the hand just above the surface without touching.
  5. Hold, lower with control, and repeat on the other leg; alternate sides.

Dose: 3 holds of 20-30 seconds per leg, 4-5 days per week; progress from full grip to fingertips to hands-off

⚠ Keep support within immediate reach at all times. If your standing ankle wobbles hard or the hip drops sharply, put weight back down and rebuild the hold time before removing hand support.

gluteus mediusankle stabilizershipcoreproprioception
A fit woman in her fifties in charcoal athletic leggings and a fitted top balances on one leg in a sunlit corner of a room, eyes closed and head turned to one side, both walls within arm's reach, opposite foot lifted, posture tall and composed in bright natural light. Balance

Single-Leg Stand, Eyes Closed with Head Turns

advanced
LongevityCognitive

The most demanding progression: balance on one leg with the eyes closed while slowly turning the head side to side, stripping away vision and adding vestibular challenge simultaneously.

WhyThis drill stacks the three hardest balance challenges at once: single-limb stance, absence of vision, and active head movement. Turning the head fires the vestibular canals and demands the vestibulo-ocular and vestibulospinal reflexes hold posture without any visual reference, while the standing gluteus medius and ankle stabilizers make continuous fine corrections. This is the same integrated control you need to look over your shoulder while walking, navigate a dark room, or recover on uneven ground at night, situations where vision is unavailable and falls are most dangerous. Training near the true limit of stability drives the largest gains in the aging nervous system's reactive balance, which is the capacity that most reliably prevents a fall.

How to do it
  1. Set up in a corner or close beside a wall so a surface is within reach on more than one side.
  2. Balance on one leg with a soft knee and confirm you are steady with your eyes open first.
  3. Softly close your eyes and hold the single-leg stance, letting your ankle make quiet corrections.
  4. Once stable, slowly turn your head to look left, return to center, then turn right, moving smoothly.
  5. Open your eyes and lower the foot at the first real loss of balance; repeat on the other leg.

Dose: 3 holds of 10-20 seconds per leg with 2-3 slow head turns each way, 3 days per week; master eyes-closed static hold first

⚠ Only attempt after you can hold an eyes-open single-leg stand hands-free for 30 seconds. Stay within arm's reach of support on multiple sides, move the head slowly, and stop if head turns provoke dizziness or vertigo.

gluteus mediusankle stabilizersvestibular systemcoreproprioception
A woman in neutral slate athletic wear pressing her back flat against a bright white wall in a sunlit room, balanced on one leg with the other foot hovering, slowly sliding down into a single-leg squat with her standing knee tracking over her foot in strong controlled form. Strength

Single-Leg Wall Slide (Eccentric)

advanced
StrengthLongevity

An advanced single-leg strength drill that uses your back against the wall to control a slow descent onto one leg, building maximal quad and glute strength and knee resilience with no weights.

WhyAs we age the fastest loss is in maximal strength and eccentric (lengthening) control, the exact quality that lets you descend stairs, lower into a chair, and absorb the force of a stumble without collapsing. This exercise concentrates the entire load on one leg during the slow lowering phase, where muscle can produce more force than it can lifting, delivering a potent hypertrophy and tendon-strengthening stimulus that rivals weighted training. The wall guides the spine and keeps the movement safe while the quadriceps, glutes, and the patellar and quadriceps tendons adapt. Heavy eccentric loading is also the best-evidenced way to build tendon stiffness and cross-sectional area, which protects the knee joint and restores explosive capacity lost to sarcopenia.

How to do it
  1. Stand with your back against a smooth wall, feet about a foot forward, and slide down into a partial squat with both feet planted.
  2. Shift your weight onto one leg and lift the other foot slightly off the floor, keeping hips level and the standing knee over your foot.
  3. Slowly slide down the wall on that single leg for a 4-5 second count, going only as deep as you can control.
  4. Plant the free foot to help press back up to the start, then reset and repeat the slow single-leg descent.
  5. Keep your entire back flat against the wall and the standing knee tracking over the toes throughout.

Dose: 3 sets of 5 slow eccentric reps per leg, 2x/week with a rest day between; increase depth or slow to a 6-second lowering to progress

⚠ Advanced only; build up with two-legged wall sits first. Never lower past the point you can control, and stop if you feel sharp or pinpoint knee pain (a dull working burn is normal). Keep a chair nearby in case you need to bail out safely.

quadricepsgluteus maximuspatellar and quadriceps tendonship and knee stabilizers
A person lying on their back on a light gray yoga mat in a sunlit living room, wearing neutral gray athletic shorts and a fitted tank top, one leg raised with the knee straightening toward the ceiling and both hands clasped behind the thigh, the other foot flat on the floor, spine relaxed and neutral, bright natural window light across the scene. Flexibility

Supine Active Hamstring Floss

beginner
LongevityStress

A gentle, active lying stretch that lengthens the hamstrings and mobilizes the sciatic nerve without loading the low back, ideal as a first flexibility drill for stiff or deconditioned people.

WhyThe hamstrings and their fascial sheath shorten with prolonged sitting, and the sciatic nerve loses its ability to glide freely through the posterior thigh. Actively straightening the knee against a slack towel creates a repeated lengthening cycle that increases the muscle's stretch tolerance (a neural adaptation) and restores neural mobility. Because it is done lying down, the pelvis stays neutral and the lumbar discs are unloaded, which matters for aging spines that no longer tolerate aggressive toe-touch stretching. Better hamstring extensibility directly improves gait length, sit-to-stand mechanics, and reduces the compensatory lumbar rounding that drives low-back pain in older adults.

How to do it
  1. Lie on your back on a mat or carpet with both knees bent, feet flat on the floor.
  2. Draw one thigh up until it is vertical, hands clasped behind the thigh (or a towel looped over the foot) to support its weight.
  3. Keeping the thigh still and vertical, slowly straighten that knee toward the ceiling until you feel a mild, tolerable stretch behind the thigh.
  4. Gently bend the knee a few degrees to release, then straighten again, oscillating slowly rather than holding at end range.
  5. Keep the opposite foot flat and the low back relaxed and neutral throughout; breathe steadily, do not hold your breath.

Dose: 2 sets of 10 slow straighten-and-release reps per leg, hold the end range 2-3 seconds, 5-6x/week

⚠ Stop if you feel sharp, shooting, or electric sensations down the leg (that is nerve irritation, not a stretch) and reduce the knee extension. Move slowly, never bounce.

hamstringsposterior chainsciatic nervecalves
A person lying on their back on a plush gray mat in a quiet, softly lit bedroom, both knees hugged gently in toward the chest with arms wrapped around the shins, shoulders and head relaxed on a thin pillow, wearing neutral charcoal loungewear, eyes closed with a peaceful expression, warm dim light from a bedside lamp. Flexibility

Supine Knees-to-Chest Hug (Apanasana)

beginner
SleepStress

A cocooning supine stretch that draws both knees into the chest and gently rocks, decompressing the lumbar spine and releasing the low back and glutes at the very end of the day.

WhyHugging both knees toward the chest flexes the lumbar spine, opening the space between the vertebrae and giving the facet joints and paraspinal muscles a gentle decompression after hours of standing and compression. It lengthens the lumbar erector spinae, the glutes, and the deep hip rotators, easing the low-back and hip tightness that so often makes lying still uncomfortable and disrupts sleep onset. The mild pressure of the thighs against the abdomen also stimulates the enteric and vagal pathways, and the closed, curled shape combined with slow breathing reliably shifts the body toward the parasympathetic state. Adding a slow side-to-side rock gives the low-back tissues a soothing self-massage against the floor, discharging residual muscular tension so the body can settle into sleep.

How to do it
  1. Lie on your back with a thin pillow under your head and draw both knees up toward your chest.
  2. Wrap your arms around your shins or the backs of the thighs, whichever keeps the shoulders relaxed and away from the ears.
  3. On each exhale, gently hug the knees a little closer until you feel a mild, comfortable stretch across the low back.
  4. Let the shoulders and neck stay soft, and optionally rock slowly a few inches side to side to massage the low back against the floor.
  5. Breathe slowly for the full hold, then release the feet to the floor to finish.

Dose: 1-2 holds of 5-10 slow breaths, nightly at the end of your wind-down

⚠ Hold behind the thighs rather than over the shinbones if you have knee pain, and keep the hug gentle with any acute disc flare-up. In pregnancy, take the knees wide around the belly rather than pressing them into the abdomen. Stop if you feel any pinching in the hips or low back.

lower backlumbar spinegluteshipserector spinae
A person lying on their back on a light gray mat in a calm, sunlit room, wearing neutral charcoal leggings and a fitted heather top, knees bent and feet flat hip-width apart, hips lifted into a smooth bridge with the ribs down and glutes engaged, face relaxed mid-exhale, soft natural window light washing across the floor. Strength

Supported Bridge with Pelvic-Floor Breath

beginner
SexualStress

A slow, breath-paced hip bridge done on a cushion under the hips, coordinating an exhale-driven pelvic-floor contraction with glute engagement to build pelvic strength and blood flow without any equipment.

WhyThis drill trains the levator ani group (the pelvic-floor sling) and the glutes to fire together, which is exactly the coordination that supports erectile and orgasmic function, ejaculatory control in men, and vaginal tone and lubrication response in women. Lifting the pelvis raises the sacrum and drives a wave of arterial blood into the pelvic bowl, while the venous return on lowering acts like a pump that flushes the deep pelvic vasculature that a sedentary, seated day leaves congested. Pairing the lift with a slow exhale and a gentle 'lift and hug' of the pelvic floor teaches the muscles to contract on effort and, just as importantly, to fully release afterward. A pelvic floor that can both contract and relax on demand is the physiological basis of arousal and pain-free intimacy, and the parasympathetic emphasis of the long exhale down-regulates the stress response that so often blunts desire.

How to do it
  1. Lie on your back with knees bent and feet flat, hip-width apart, a firm cushion optional under the hips for a gentle assist.
  2. Inhale to let the belly and pelvic floor soften and drop toward the floor, keeping the low back neutral.
  3. As you exhale slowly, gently draw the pelvic floor up and in (imagine lifting a blueberry with the sit bones), squeeze the glutes, and peel the hips off the floor one vertebra at a time.
  4. Pause at the top for two breaths with the glutes and pelvic floor lightly engaged, ribs down so the low back does not arch.
  5. Inhale to fully release the pelvic floor as you lower the spine down slowly, and let it completely relax before the next rep.
  6. Keep the neck long and shoulders relaxed; never hold your breath or bear down.

Dose: 2-3 sets of 8-10 slow reps with a 2-breath hold at the top, 4-5x/week

⚠ The 'release' phase matters as much as the lift; if you have an overactive or painful pelvic floor, prioritize the relaxation and skip the hold. Stop if you feel bulging, heaviness, or pain in the pelvis. During pregnancy avoid extended time flat on the back after the first trimester and clear pelvic-floor work with your provider.

pelvic floorgluteslevator aniposterior chainpelvic circulation
A man in his forties in plain navy joggers and a heather t-shirt kneels on a light exercise mat in a calm sunlit room, hips settled back toward his heels, arms stretched forward on the floor and forehead resting gently on a folded towel, back long and shoulders relaxed and heavy. Flexibility

Supported Child's Pose

beginner
StressSleep

A restful kneeling fold where the hips sink toward the heels and the forehead rests on the floor or a cushion, arms extended or draped alongside the body.

WhyChild's Pose combines several down-regulating inputs at once. The forward-folded, curled-in shape gently compresses and stretches the paraspinal muscles and lumbar fascia while decompressing the lumbar facet joints, releasing the low-back guarding that accumulates under stress. Grounding the forehead on the floor or a cushion applies light pressure to the frontal region and lets the neck fully release, which many people find calming; combined with a supported, enclosed posture it reduces vigilance and lowers sympathetic tone. Because the belly rests against the thighs, each inhale meets gentle resistance and encourages slower, more complete diaphragmatic breathing, and it is diaphragmatic breathing that most directly raises vagal (parasympathetic) activity to slow heart rate and quiet the stress response, making this a reliable pose to unwind before sleep.

How to do it
  1. Kneel on the floor and bring your big toes together, then let your knees spread about mat-width apart.
  2. Exhale and sink your hips back toward your heels, walking your hands forward as your torso lowers between your thighs.
  3. Rest your forehead on the floor, a cushion, or stacked fists, and let your neck and shoulders go completely soft.
  4. Extend your arms forward for more stretch, or drape them back alongside your body for a more restful version.
  5. Breathe slowly into your back and belly for the hold, feeling the ribs widen with each inhale.

Dose: Hold for 8 to 12 slow breaths, 1 to 3 times, especially as a wind-down

⚠ Place a cushion under the hips or between the calves and thighs if the knees or ankles feel strained, and a rolled towel behind the knees if they do not fully bend. Widen the knees and support the belly with a cushion if you are pregnant, and skip the deep forehead-down fold in later pregnancy. Ease off with acute knee injury or if the deep knee bend is painful.

lumbar spineerector spinaehipsshouldersdiaphragm
A woman in her thirties in charcoal leggings and a tank top squats deeply with heels flat on a hardwood floor in a bright room, both hands lightly gripping the edge of a sturdy wooden table for support, hips sunk low, chest upright and knees tracking out over her toes in a relaxed resting squat. Mobility

Supported Deep Squat Hold (Ankle and Hip Opener)

intermediate
LongevitySexual

A resting hold at the bottom of a deep squat, holding a sturdy support to load the hips, knees, and ankles safely through their full flexion range.

WhySitting into a full-depth squat drives the hips, knees, and especially the ankles through their end-range flexion, positions modern life almost never demands. The ankle dorsiflexion required here depends on a mobile talocrural joint and a long, compliant soleus and gastrocnemius; losing it is strongly linked to falls, because stiff ankles blunt your ability to recover balance. The hold also lengthens the adductors, glutes, and Achilles tendon and loads the knee in deep flexion to keep the joint capsule and cartilage tolerant of that range. Preserving deep-squat mobility keeps getting up from the floor, gardening, and using low seats independent and painless with age.

How to do it
  1. Stand facing a sturdy support with feet slightly wider than hip-width, toes turned out a little.
  2. Hold the support with both hands and slowly lower your hips down and back toward a full squat, keeping heels on the floor.
  3. Settle into the deepest comfortable position with your chest lifted and knees tracking over your toes.
  4. Let your bodyweight sink through the hips and ankles, using the support to unload as much as you need.
  5. Hold and breathe, then use the support to press back up to standing.

Dose: 3 holds of 20 to 40 seconds, 4 to 5 days per week

⚠ Keep hold of the support throughout, especially if your balance or knees are unsure. If heels lift off the floor, elevate them on a rolled towel and reduce depth. Come out of the hold if you feel knee pinching or numbness in the feet.
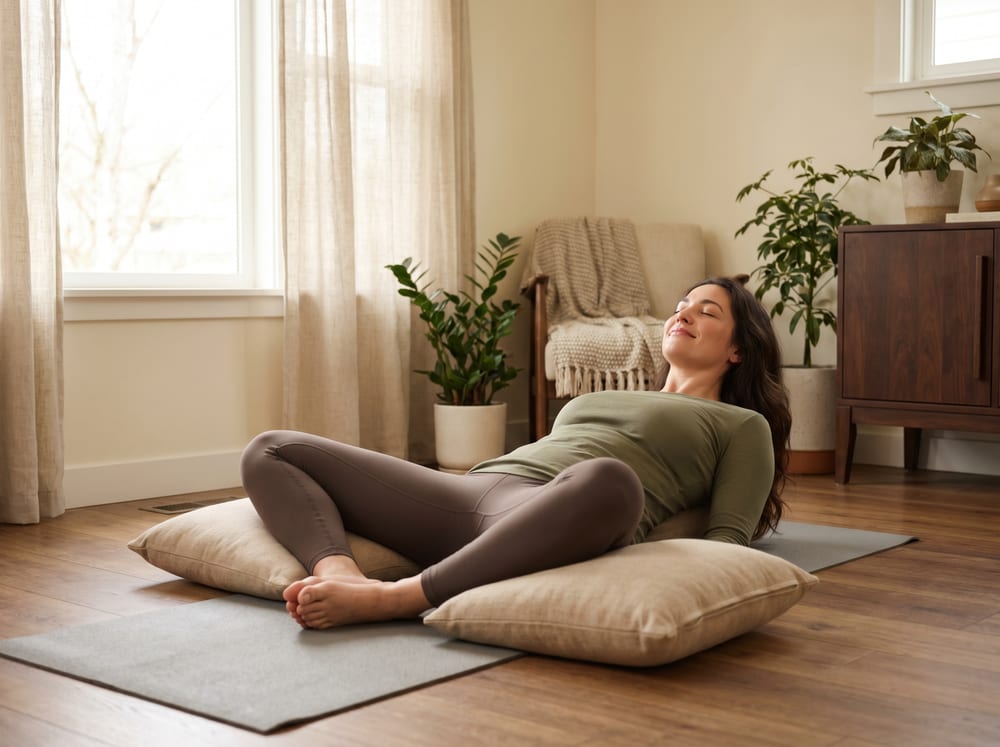
ankleshipskneesadductorsAchilles tendonglutes
A warm, photorealistic editorial photograph in a bright calm room with a soft ivory and espresso palette, soft natural window light, 4:3 framing, no text or words anywhere. A woman in her early thirties in modest neutral athletic wear stands upright and vertical, not rotated, on a plain exercise mat, holding a simple water jug against her chest with both hands as she sits into a controlled squat with an upright torso, a plain wooden chair beside her within easy reach for balance. Strength

Supported Goblet Squat with a Household Load

beginner
FertilityStrengthCardio

A slow, controlled squat holding a weighted household object at the chest, using a wall or chair for reassurance, to build moderate lower-body and glute strength that supports healthy body composition without tipping into the exhaustive training that can work against fertility.

WhyModerate resistance training is one of the more consistent evidence-based levers on the metabolic factors that underlie fertility in both women and men. The large muscles worked in a squat, the quadriceps and glutes, are the body's biggest sink for glucose disposal, and regularly loading them improves insulin sensitivity. That matters because insulin resistance and excess central adiposity are strongly linked to disrupted ovulation, notably in PCOS, and to lower testosterone and poorer sperm parameters in men. Building lean muscle also shifts body composition toward a range associated with more regular cycles and better hormonal balance, a plausible route by which resistance training may support conception. The evidence here is moderate and largely observational or drawn from metabolic and PCOS studies rather than from large fertility trials, so treat this as metabolic groundwork rather than a proven fertility treatment. Crucially, the prescription is deliberately moderate: very high training volume and low body fat can suppress the reproductive axis, so the goal is a sustainable strength stimulus, not maximal fatigue.

How to do it
  1. Stand tall and vertical with feet a little wider than hip width, toes turned slightly out, a wall or chair beside you for light support.
  2. Hold the weighted object against your chest with both hands, elbows tucked, spine long and shoulders relaxed.
  3. Breathe in, brace your midsection gently, and sit your hips back and down as if lowering onto a low stool, keeping your chest upright.
  4. Descend only as far as you can while keeping your heels flat and your knees tracking over your toes, pausing when thighs approach parallel or at a comfortable depth.
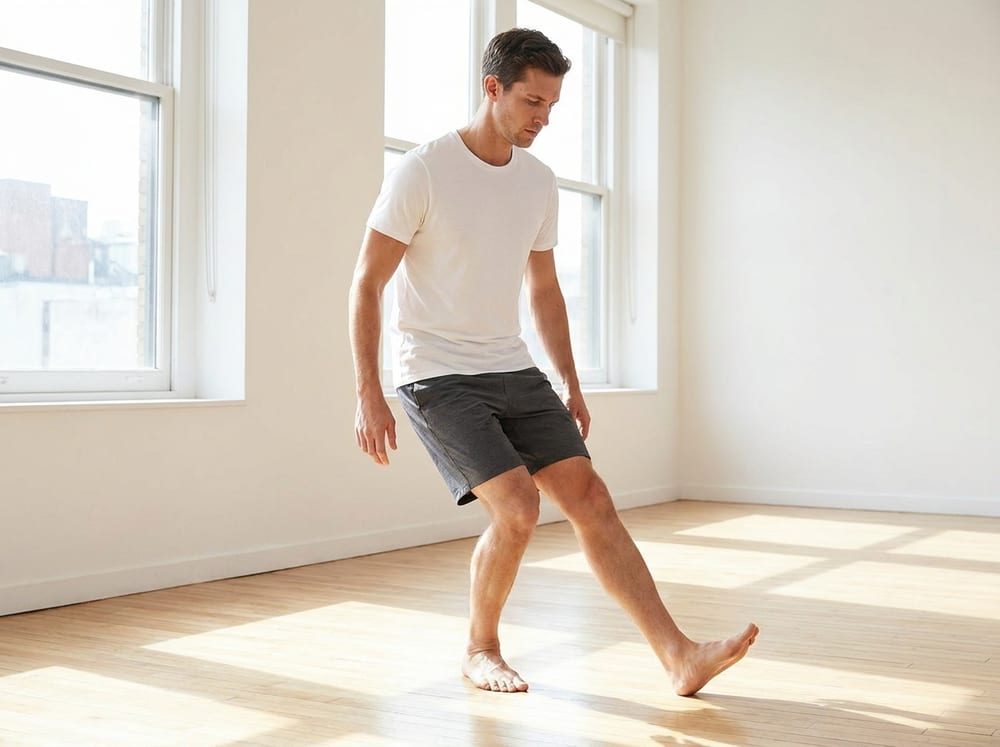
  5. Breathe out and drive through your whole foot to stand back up tall, squeezing the glutes at the top without locking the knees.
  6. Move slowly and stop several repetitions short of failure so effort stays moderate, never maximal.

Dose: 2-3 sets of 8-12 slow repetitions, 2-3 non-consecutive days per week, keeping every set well short of exhaustion

⚠ This is educational information for discussion with your clinician, not medical or fertility advice. If you are pregnant or trying to conceive, clear a resistance routine with your care team first, and stop the moment you feel breath-holding strain, pelvic pressure, or dizziness. Keep effort moderate: overtraining and very low body fat can impair, not help, fertility. Start with body weight alone before adding load, keep support within reach, and avoid straining or aggressive breath-holding, which spikes intra-abdominal and blood pressure.

quadricepsglutealshamstringscore
A person lying on their back on a soft light-colored mat in a bright, airy room, wearing neutral sage joggers and a fitted top, knees drawn wide toward the armpits with hands holding the backs of the thighs, shins upright and low back settled into the floor, expression calm and breathing easy, gentle daylight from a window nearby. Flexibility

Supported Happy Baby Hip Opener

beginner
SexualStress

A gentle supine hip opener that draws the knees toward the armpits while holding behind the thighs, decompressing the hip joints and lengthening the inner-thigh and pelvic-floor tissues that sitting keeps tight.

WhyThe adductors (inner thighs), the deep hip external rotators, and the pelvic-floor muscles all share fascial connections around the pelvic outlet, and a lifetime of chairs leaves this region short, guarded, and poorly perfused. Opening the hips into flexion and external rotation lengthens the adductors and gently stretches the pelvic floor from the outside in, restoring the pliability and range that comfortable, pain-free intimacy depends on, especially the ability to abduct and externally rotate the hips without groin or pelvic tension. Because the position is fully supported on the back, the nervous system reads it as safe, letting the pelvic-floor muscles down-regulate and release rather than guard. That release, combined with the increased hip mobility, addresses one of the most common mechanical contributors to painful or effortful sex, which is a hip and pelvic complex that cannot open.

How to do it
  1. Lie on your back and draw both knees up toward your chest.
  2. Let the knees widen apart toward your armpits and reach up to hold the backs of the thighs, the shins, or the outer edges of the feet, whatever your flexibility allows.
  3. Gently guide the knees down toward the floor on either side of your torso, keeping the shins roughly vertical.
  4. Press the low back and sacrum lightly into the floor so the tailbone stays down and the pelvis does not tuck up off the mat.
  5. Breathe slowly into the belly and, on each exhale, let the inner thighs and pelvic floor soften and release a little further; you may add a slow, gentle side-to-side rock.
  6. Keep the shoulders and neck relaxed on the floor throughout.

Dose: Hold and breathe for 60-90 seconds, 2-3 rounds, most days of the week

⚠ Hold behind the thighs rather than the feet if reaching the feet forces the low back to round off the floor. Ease off with knee, hip, or groin pain, and avoid this deep supine hip flexion in late pregnancy or if a provider has restricted end-range hip work.

hip adductorsinner thighsdeep hip rotatorspelvic floorhip capsule
A woman in her thirties wearing neutral grey leggings and a fitted tank top stands on a wooden floor in soft natural window light, folded forward from the hips with knees slightly bent, torso relaxed against her thighs, head hanging loose and arms dangling toward the floor, spine gently rounded and shoulders released. Flexibility

Supported Standing Forward Fold

beginner
StressSleep

A slow, passive forward hang from standing with soft knees, letting the head and arms dangle so the whole back of the body releases toward the floor.

WhyLetting the torso hang forward puts the head below the heart, a mild inversion that stimulates baroreceptors in the carotid arteries and helps shift the autonomic nervous system from sympathetic (fight-or-flight) toward parasympathetic (rest-and-digest) dominance, slowing heart rate and lowering perceived tension. Mechanically it lengthens the entire posterior chain under gentle gravitational load: the hamstrings, gastrocnemius, and the thoracolumbar fascia and erector spinae that habitually grip during stress and desk-bound sitting. Releasing that chronic paraspinal and hamstring guarding decompresses the lumbar spine and interrupts the clenched-posture feedback loop that keeps a stressed body braced, which is why a slow fold reliably down-regulates arousal before sleep.

How to do it
  1. Stand with feet hip-width apart and unlock your knees so they are softly bent, not locked straight.
  2. Exhale and hinge forward from the hips, letting your spine round gently and your head hang heavy toward the floor.
  3. Let your arms dangle completely, or hold opposite elbows and let the weight of your arms rock you slowly side to side.
  4. Release your neck fully so your head feels loose, and let each exhale allow you to sink a little lower without forcing.
  5. Breathe slowly for the hold, then roll up one vertebra at a time, stacking the head last.

Dose: Hold for 5 to 8 slow breaths, 2 to 3 times, ideally in the evening

⚠ Keep knees bent to protect the low back and hamstrings; never bounce. Roll up slowly and come up gradually if you are prone to dizziness or have low blood pressure, since the head-below-heart position can cause a light-headed spell on rising. Avoid or keep the head higher than the heart if you have uncontrolled high blood pressure, glaucoma, retinal issues, or acute disc pain.

hamstringserector spinaethoracolumbar fasciacalvesneck
A woman in her forties in light heather leggings and a tank top walks a straight line down a bright hallway, right heel placed directly against the toes of her left foot, arms out slightly for balance, gaze forward, morning light streaming across the floor. Balance

Tandem Heel-to-Toe Walk

intermediate
LongevityCognitive

Walking a straight imaginary line placing the heel of one foot directly against the toe of the other, narrowing the base of support to challenge dynamic balance in motion.

WhyTandem walking shrinks your side-to-side base of support to almost nothing, which forces the hip abductors and adductors and the ankle stabilizers to control frontal-plane sway dynamically while the body is moving forward. It also loads the vestibular system during head and trunk translation, not just quiet standing. This is exactly the demand of walking through a narrow space, on a curb edge, or turning in a crowd. It is a standard clinical assessment because performance closely tracks real-world mobility. Training it improves stride confidence, reduces the wide-based shuffling gait that develops with aging, and strengthens the reactive control that keeps a misstep from turning into a lateral fall.

How to do it
  1. Choose a hallway so a wall is within reach on one side, and pick a straight line on the floor to follow.
  2. Step forward and place the heel of your front foot directly touching the toes of your back foot.
  3. Fix your gaze on a point ahead at eye level rather than looking down at your feet.
  4. Continue placing heel to toe along the line, pausing a beat on each step to find stability.
  5. Walk 10-20 steps, turn around slowly with a wide base, and repeat.

Dose: 3-4 passes of 10-20 steps, 3-4 days per week; progress by looking straight ahead instead of down

⚠ Keep a wall or rail within reach, especially on turns, which are the least stable moment. Slow down and widen your stance to turn rather than pivoting on a narrow base.

hip abductorship adductorsankle stabilizerscorevestibular system
A man in a plain navy t-shirt and gray shorts leaning into a wall push-up in a bright living room, body in a straight rigid line from head to heels, elbows tucked at 45 degrees, chest lowered toward the white wall in controlled form. Strength

Wall Push-Up

beginner
Strength

A scalable upper-body pressing exercise performed against a wall to build chest, shoulder, and arm strength with almost no injury risk, ideal for beginners or anyone rebuilding pushing capacity.

WhyPressing strength in the pectorals, anterior deltoids, and triceps underlies everyday tasks like pushing open heavy doors, getting up off the floor, and catching yourself during a stumble. The wall angle offloads most of your bodyweight, letting deconditioned tissue adapt safely, while still driving the mechanical tension that stimulates muscle protein synthesis. Crucially, it also loads the wrist extensors and the serratus anterior that stabilizes the shoulder blade, tissues that atrophy with age and desk posture. Maintaining pressing strength protects the shoulder from impingement and keeps the joint capsule healthy through its full range.

How to do it
  1. Stand arm's length from a wall and place your palms flat on it, slightly wider than shoulder-width, at chest height.
  2. Step your feet back so your body forms a straight line from head to heels; brace your core so your hips do not sag.
  3. Bend your elbows to about 45 degrees from your body and lower your chest toward the wall under control.
  4. Pause when your nose nearly touches, keeping your neck neutral, then press firmly back to the start.
  5. To make it harder, step your feet farther from the wall; to make it easier, step closer.

Dose: 3 sets of 12 reps, 3x/week; when 12 feels easy, move your feet back to increase the load

⚠ Keep your body rigid and avoid letting the low back arch. Those with acute wrist pain can make fists and press on the knuckles instead.
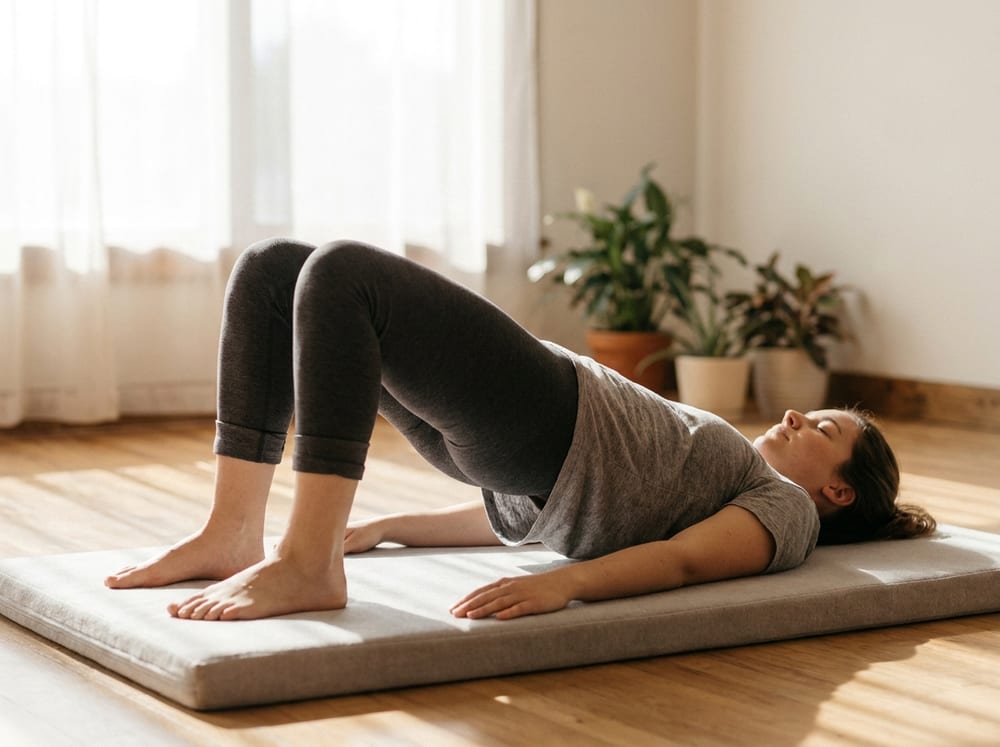
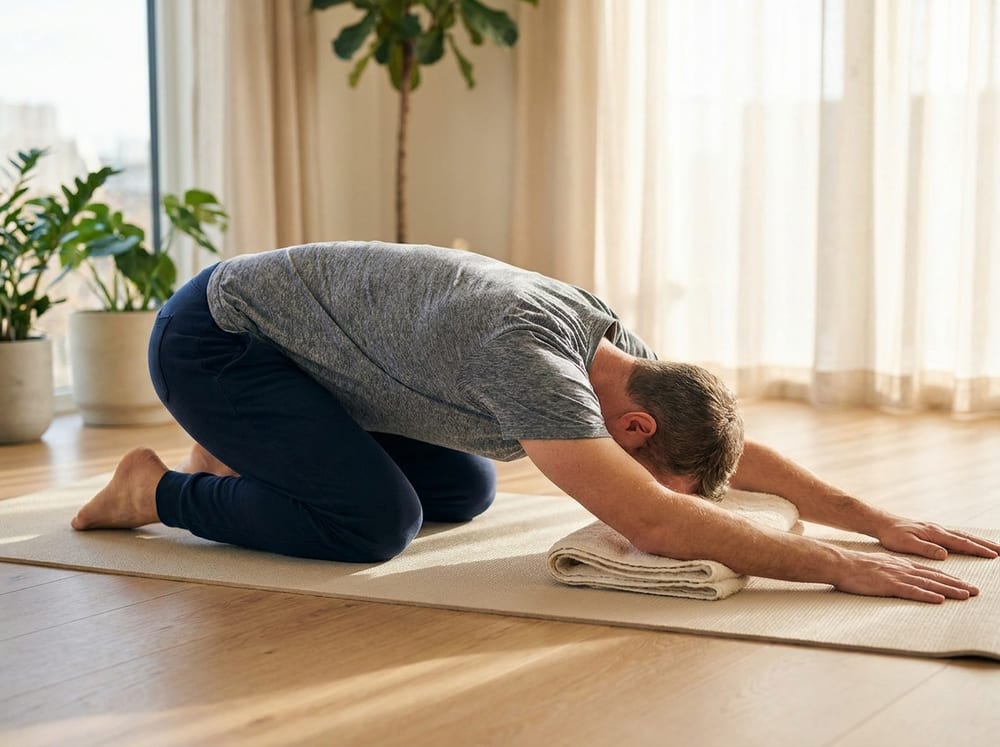
pectoralsanterior deltoidstricepsserratus anterior
A woman in her fifties in light heather athletic wear stands with her back and arms pressed against a plain white wall in a bright naturally lit room, arms raised in a goalpost shape and sliding upward toward overhead, elbows and the backs of her hands staying in contact with the wall, ribs down and lower back flat, posture tall and controlled. Mobility

Wall Slide (Shoulder and Upper Back Opener)

intermediate
LongevityStress

A standing overhead reaching drill performed against a wall that restores full, well-organized shoulder elevation and unglues a rounded upper back.

WhySliding the arms overhead while pinned to a wall trains true shoulder flexion coupled with the upward rotation of the scapula and the extension of the thoracic spine that healthy overhead reaching requires. The wall gives immediate feedback that exposes the compensations, shrugging, ribs flaring, or elbows drifting forward, that people substitute as the joint stiffens. This lengthens the pecs and lats and activates the lower trapezius and serratus anterior, the muscles that position the shoulder blade so the rotator cuff has room to work. Keeping clean overhead range protects against the impingement and stiffness that make reaching a high shelf, washing your hair, or putting on a coat painful with age.

How to do it
  1. Stand with your back to the wall, feet a few inches out, and gently flatten your lower back by tucking the pelvis so ribs stay down.
  2. Place the backs of your arms against the wall in a goalpost position, elbows bent to 90 degrees and forearms flat.
  3. Slowly slide your arms up the wall toward overhead, keeping wrists, elbows, and the backs of your hands in contact.
  4. Reach as high as you can while maintaining contact, then slide back down, squeezing the shoulder blades down and together at the bottom.
  5. Keep your ribs down and lower back flat the entire time so the motion comes from the shoulders and upper back.

Dose: 3 sets of 8 to 10 slow slides, 4 to 5 days per week

⚠ Do not let your lower back arch off the wall or your ribs flare to fake more range; only go as high as you can keep contact. Move slowly and stop before any shoulder pinching. Reduce range if you have a shoulder injury or recent shoulder surgery until cleared.

shouldersscapulathoracic spinelower trapeziusserratus anteriorlats
A person in a deep flat-footed squat next to a light-colored wall in a bright home space, wearing neutral gray athletic shorts and a fitted top, hips sunk well below the knees with heels flat and chest tall, one arm reaching up and across as the ribcage rotates open toward the ceiling while the other hand rests lightly on the wall for balance, clear natural daylight. Flexibility

Wall-Supported Deep Squat Hold with Rotational Reach

advanced
LongevitySexual

An advanced end-range mobility hold in a deep squat, using a wall for security, that simultaneously loads the ankles, hips, and thoracic spine at their combined limits.

WhyThe deep resting squat is a full-body flexibility position most adults in chair-based cultures lose entirely by midlife, and losing it is a marker of accelerated functional decline. Holding the bottom position under body weight applies a prolonged, low-load stretch across the ankle (dorsiflexion via the soleus and posterior capsule), the hip (deep external rotators and adductors), and the knee, encouraging viscoelastic tissue creep and increased stretch tolerance across all three joints at once. Adding a thoracic rotational reach layers mid-back extension and rotation onto that base. Restoring this pattern preserves the ankle dorsiflexion needed to descend stairs safely, the hip depth for getting onto and off the floor unassisted, and the balance-at-end-range that prevents falls, making it one of the highest-yield mobility positions for aging well.

How to do it
  1. Stand facing a wall about a foot away, feet shoulder-width and turned out slightly, holding a chair back or door handle for security if balance is uncertain.
  2. Slowly lower into a deep squat, sinking the hips below the knees while keeping the heels flat on the floor and the chest tall.
  3. Settle into the bottom, letting the elbows rest gently inside the knees to ease them apart, and relax into the position while breathing.
  4. From the bottom hold, reach one arm up and across, rotating the ribcage open toward the ceiling, then return and repeat on the other side.
  5. To stand, drive through the heels with a tall chest, using the wall or handle for support as needed.

Dose: 3-5 holds of 30-60 seconds, adding 3-4 rotational reaches per side within the hold, 4-5x/week

⚠ Keep a hand on the wall, chair, or handle if your heels lift or you feel unstable, this is balance work at end range and a controlled bailout matters. Ease off with any sharp knee pain. If heels will not stay down, place a rolled towel under them and progress gradually.

ankle dorsiflexorssoleuship external rotatorsadductorsthoracic spine
An athletic man in his forties in navy shorts and a fitted gray shirt balances on one slightly bent leg in a bright open room, torso hinged forward and the opposite leg extended straight behind him in a level line, one hand steadying against a plain white wall as he rotates his pelvis open with focused control. Mobility

Wall-Supported Hip Airplane

advanced
LongevitySexualCognitive

A single-leg standing rotation of the pelvis over a fixed thigh, using a wall for balance, that mobilizes the hip through internal and external rotation while challenging control.

WhyThe hip airplane drives the femoral head through both internal and external rotation inside the joint capsule while the deep hip stabilizers, the glute medius and the small external rotators, work to control it. Rotational hip mobility is usually the first plane of motion lost with age and is a hidden driver of low-back pain, because a stiff hip forces the lumbar spine to compensate when you turn or pivot. Combining active rotation with single-leg loading also trains the hip stabilizers and proprioceptors together, which is exactly the coordination needed to change direction, walk on uneven ground, and avoid a fall without a stumble.

How to do it
  1. Stand an arm's length from a wall, place one hand on it, and shift your weight onto the near leg with a soft knee.
  2. Hinge forward at the hip and extend the other leg straight behind you until your torso and back leg form one line, roughly parallel to the floor.
  3. Keeping that line rigid, slowly rotate your pelvis open, letting the top hip roll toward the ceiling.
  4. Rotate back through neutral and close the pelvis the other way, letting the top hip roll toward the floor.
  5. Move slowly and with control through 6 to 8 rotations, then switch legs.
  6. Use the wall as much as needed to stay balanced throughout.

Dose: 3 sets of 6 controlled rotations per leg, 3 days per week

⚠ This is an advanced balance and control drill; always keep a hand on the wall and progress the range gradually. Keep the standing knee soft and never let it cave inward. Skip or regress this if you have acute hip pain or unstable balance, and clear it with a clinician after a hip replacement.

hip rotatorsgluteus mediuship capsulehip stabilizerscore